There’s something undeniably captivating about vintage photography. The warm tones, soft textures, and nostalgic imperfections evoke memories of the past, making modern photos feel like treasured moments from another era. Whether inspired by classic film cameras, old polaroids, or faded family albums, the vintage aesthetic adds character and emotion to your images.
Fortunately, you don’t need an old film camera to achieve this timeless look. With the right editing techniques, you can transform any digital photo into a beautifully aged masterpiece. By adjusting colors, adding grain, and applying subtle effects, you can recreate the charm of vintage photography right from your computer or smartphone.
Popular editing tools like Adobe Lightroom and Photoshop offer advanced controls for fine-tuning the vintage aesthetic, while mobile apps like VSCO, Snapseed, and Afterlight provide quick and easy ways to achieve similar effects. Whether you’re an aspiring photographer or just want to add a nostalgic touch to your photos, mastering these editing techniques will bring your images to life with a vintage atmosphere.
Shall we dive into the techniques? Let’s get started! 🚀
Adjusting Colors for a Retro Look
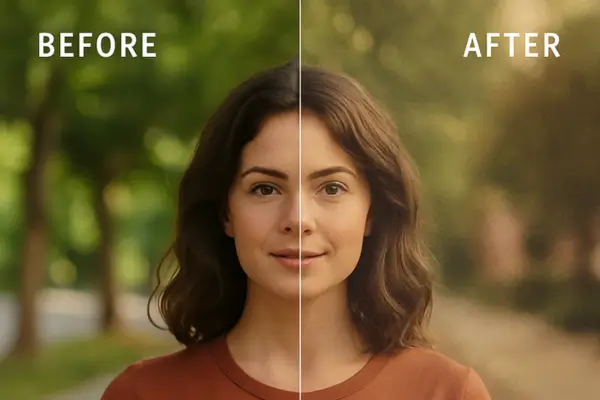
One of the easiest ways to create a vintage atmosphere in your photos is by adjusting the colors to mimic the faded, warm look of old film prints. This can be achieved through desaturation, color toning, and split toning. Let’s explore how these adjustments can bring nostalgic charm to your images.
Desaturating Colors for a Faded Effect
Vintage photos often have a soft, muted color palette due to the natural aging of film and prints over time. To achieve this look, slightly reduce the saturation of your image in editing software like Lightroom or Photoshop. This will remove the vibrancy of modern digital photos and give them a more subdued, classic appearance.
- In Lightroom, use the Vibrance and Saturation sliders to tone down intense colors. Lowering vibrance instead of saturation can help maintain some color variation without making the image look completely washed out.
- In Photoshop, use the Hue/Saturation adjustment layer and reduce saturation slightly, ensuring the image doesn’t become too dull.
Adding Warm or Sepia Tones to Mimic Aged Photos
Many vintage photos, especially those from the early to mid-20th century, have a warm or sepia tone due to the aging process of film and paper. Adding a slight yellow, brown, or red tint can replicate this nostalgic look.
- In Lightroom, use the Temperature slider to add warmth. Increasing the Tint slightly towards magenta can also enhance the aged feel.
- Apply a Color Balance adjustment in Photoshop and shift the midtones towards yellow and red for a natural vintage warmth.
- Use sepia filters or LUTs (Lookup Tables) to create an instant aged look with minimal effort.
Using Split Toning to Enhance the Vintage Aesthetic
Split toning is a powerful technique for recreating the subtle color shifts found in old photographs. It allows you to apply different colors to the highlights and shadows, adding depth and a unique aged look.
- In Lightroom, navigate to the Color Grading panel (formerly called Split Toning) and apply warm tones (yellow, orange, or red) to the highlights while using cooler tones (blue or green) in the shadows for a balanced, cinematic effect.
- In Photoshop, use the Gradient Map adjustment layer to introduce subtle tonal shifts that resemble classic film effects.
By combining these color adjustments, you can transform any modern digital photo into an image with a timeless, vintage aesthetic. Experiment with different tones and saturation levels to find the perfect nostalgic feel for your pictures.
Adding Film Grain and Texture
One of the key elements in achieving a vintage look in your photos is adding grain and texture. Traditional film photography often had a distinct grain structure due to the chemical composition of the film. Digital photos, however, tend to be too sharp and clean, which can make them look overly modern. By incorporating grain and subtle imperfections, you can recreate the authentic charm of old film photography.
The Importance of Grain in Vintage Photography
Grain is a crucial aspect of vintage aesthetics because it mimics the look of older film stocks, giving photos a raw, organic feel. Unlike digital noise, which can be distracting, film grain adds character and enhances the nostalgic atmosphere of an image. It can make photos feel more cinematic, artistic, and even evoke emotions tied to old memories.
How to Add Grain in Lightroom and Photoshop
In Adobe Lightroom:
- Open your image in Lightroom and go to the “Develop” module.
- Scroll down to the “Effects” panel.
- Locate the “Grain” settings, where you’ll find three sliders:
- Amount – Controls the intensity of the grain.
- Size – Adjusts how large the grain particles appear.
- Roughness – Determines how fine or coarse the grain texture is.
- Start with a subtle amount and increase it gradually to maintain a natural look.
- Experiment with different combinations to match the aesthetic of various film styles (e.g., a fine grain for classic film or a rougher grain for a more dramatic effect).
In Adobe Photoshop:
- Open your image and create a new blank layer.
- Fill the layer with 50% gray (Edit > Fill > 50% Gray).
- Go to Filter > Noise > Add Noise and select Monochromatic for a natural black-and-white grain effect.
- Adjust the noise intensity and set the blending mode of the layer to Overlay or Soft Light.
- Lower the opacity if needed to make the effect more subtle.
Using Dust and Scratch Overlays for an Aged Effect
To enhance the vintage feel further, consider adding dust, scratches, and film imperfections. These textures simulate the wear and tear that naturally occurred in old photographs and negatives.
How to Apply Overlays in Photoshop:
- Download a dust or scratch overlay (many free and paid options are available online).
- Drag the overlay onto your image as a new layer.
- Set the blending mode to Screen or Lighten to remove the black background and keep only the texture.
- Adjust the opacity or use a layer mask to fine-tune the effect.
Alternative: Using Apps and Filters
If you’re editing on a mobile device, apps like VSCO, Snapseed, and RNI Films offer built-in grain and texture effects that mimic old film photography. Simply apply a vintage filter and tweak the grain intensity to suit your style.
By mastering grain and texture techniques, you can transform modern digital photos into timeless vintage masterpieces, making them look as if they were shot on an old-school film camera.
Using Light Leaks and Vignettes
How Light Leaks Create a Dreamy, Retro Effect
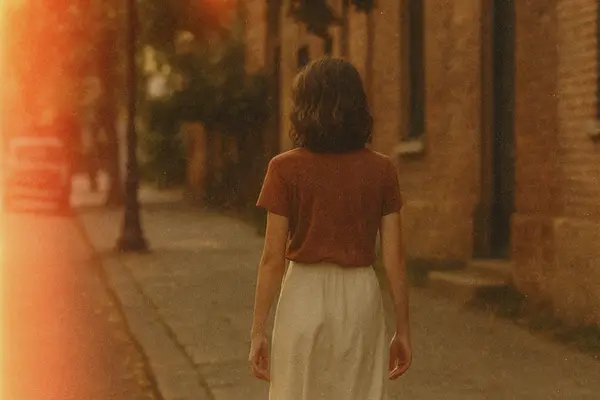
Light leaks are a hallmark of vintage film photography, originally caused by accidental exposure of film to light. These imperfections, once considered flaws, are now embraced for their nostalgic and artistic appeal. Light leaks add a warm, hazy glow to images, often in shades of red, orange, or yellow, mimicking the unpredictable beauty of old-school film cameras.
To achieve this effect in digital editing:
- Use Overlays: Many photo editing apps, like Photoshop and Lightroom, offer light leak overlays that can be layered onto images. Simply adjust the opacity and blend mode (such as Screen or Soft Light) for a natural effect.
- Adjust the Gradient Tool: In Lightroom or Photoshop, you can manually create a soft, colorful gradient to mimic a light leak. Position it on the edges of the photo and reduce opacity for a subtle look.
- Try Mobile Apps: Apps like Afterlight and Lens Distortions offer built-in light leak effects that can be applied with a single tap.
Light leaks work best when used sparingly and positioned naturally, as if coming from a side light source. Overuse can make the effect look artificial rather than vintage.
Adjusting Vignette Settings for a Classic Film Camera Look
Vignettes are another powerful tool for recreating the vintage aesthetic. A vignette darkens or lightens the edges of a photo, subtly drawing attention to the subject in the center. Many old film cameras produced natural vignetting due to lens limitations, so adding this effect enhances the retro feel.
To create a vignette effect:
- Use the Vignette Tool in Lightroom: Under the “Effects” panel, adjust the “Post-Crop Vignetting” slider. A slight darkening around the edges will give a soft, cinematic look.
- Create a Radial Filter: In Lightroom, apply a Radial Filter around the subject and reduce the exposure on the outer areas. This gives you more control over the vignette intensity.
- Use Photoshop’s Lens Correction Filter: In Photoshop, go to Filter > Lens Correction and adjust the vignette sliders to darken or lighten the edges.
A well-placed vignette makes images feel timeless and naturally composed, guiding the viewer’s eye while enhancing the nostalgic aesthetic. For a more authentic look, combine vignetting with other effects like grain and faded tones.
Playing with Contrast and Fade Effects
One of the key elements in creating a vintage atmosphere in your photos is adjusting the contrast and adding fade effects. Old film prints tend to lose some of their deep blacks and bright whites over time, resulting in a softer, more muted appearance. You can replicate this effect in your edits with a few simple adjustments.
Lowering Contrast for a Softer, Aged Look
Vintage photos often lack the high contrast found in modern digital images. To achieve a retro aesthetic:
- Reduce contrast slightly in your editing software to soften the difference between light and dark areas.
- Adjust the blacks and shadows to lift them slightly, creating a faded and washed-out effect.
- Lower the whites and highlights to avoid overly bright areas that can feel too crisp for a vintage style.
This technique helps give your image a more natural, film-like appearance, as older photos often had less dramatic contrast due to the limitations of analog film and print aging.
Using Fade Effects to Mimic Old Film Prints
The fade effect is another powerful tool for recreating the nostalgic look of aged photographs. Over time, film prints lose some of their depth, leading to a soft, dreamy quality. To apply this effect:
- In Lightroom or Photoshop, adjust the Tone Curve by lifting the leftmost point of the curve upwards. This reduces the intensity of deep blacks, making the image look faded.
- In mobile apps like VSCO or Snapseed, use the Fade tool to gently soften the image and reduce its intensity.
- Experiment with decreasing clarity slightly to remove harsh details, enhancing the soft and worn-out appearance.
By carefully playing with contrast and fade, you can transform your photos into timeless pieces that feel like they belong to another era. Don’t be afraid to experiment—every image will require unique tweaks to achieve the perfect vintage effect!
Experimenting with Filters and Presets
One of the easiest ways to achieve a vintage aesthetic in your photos is by using filters and presets. Whether you’re working with professional software like Lightroom and Photoshop or editing on your phone with mobile apps, presets can instantly transform your images with nostalgic tones, faded colors, and film-like textures.
Best Lightroom/Photoshop Presets for Vintage Looks
Lightroom and Photoshop offer a variety of presets that can help you achieve a classic vintage style. Here are some of the best options:
- Kodak-Inspired Presets – Mimic the warm, slightly faded tones of classic Kodak film.
- Faded Film Presets – Reduce contrast and add a soft fade effect to create an old-film feel.
- Sepia & Warm Tone Presets – Perfect for recreating the look of aged photographs from the early 20th century.
- Polaroid Effect Presets – Add pastel hues, vignettes, and light leaks to imitate instant film photos.
- Black & White Vintage Presets – Ideal for creating dramatic monochrome images with a retro touch.
You can find these presets on Adobe’s marketplace, third-party photography websites, or even create your own custom presets by adjusting color curves, saturation, and grain levels.
Popular Mobile Apps That Offer Vintage Filters
If you prefer editing on your smartphone, several mobile apps provide high-quality vintage filters:
- VSCO – Offers a variety of film-inspired presets, including Kodak, Fuji, and Agfa-style effects.
- Snapseed – Includes tools for adding grain, vintage color grading, and retro-style vignettes.
- Afterlight – Features light leaks, dust textures, and customizable film effects.
- 1998 Cam – Designed specifically for creating old-school film camera aesthetics.
- Huji Cam – Simulates the look of disposable film cameras with built-in light leaks and date stamps.
These apps are great for quick edits and can help you achieve an authentic vintage look without needing advanced editing skills.
By experimenting with different filters and presets, you can find the perfect combination to bring a nostalgic feel to your photos. Try mixing adjustments, layering effects, and tweaking settings to create a unique, timeless look!
Simulating Film Camera Effects
One of the most effective ways to create a vintage atmosphere in your photos is by mimicking the unique characteristics of classic film stocks. Each film brand has its own distinctive color tones, grain, and contrast levels, which you can replicate using digital editing tools.
Mimicking Specific Film Styles
- Kodak – Known for its warm, slightly yellowish tones, Kodak film gives images a nostalgic and timeless feel. To achieve this look, increase warmth in your white balance, enhance yellows and oranges in the color mix, and add a subtle grain effect.
- Fujifilm – Fuji films, especially those from the Fujicolor series, tend to have cooler tones with a slight greenish tint. You can replicate this effect by adjusting the hue of greens and blues while reducing the overall saturation for a muted look.
- Polaroid – Polaroid photos are famous for their soft, faded colors and slight blur. To recreate this effect, reduce contrast, add a gentle fade, and apply a light vignette to draw attention to the center of the image.
Adjusting Sharpness and Clarity for an Authentic Feel
Vintage film photos often have a softer, less sharp appearance compared to modern digital images. To replicate this:
- Reduce sharpness slightly to mimic the natural softness of film photography.
- Lower the clarity in Lightroom or Photoshop to create a hazy, dreamy effect.
- Add a subtle blur, particularly around the edges, to simulate lens imperfections from older cameras.
- Apply a small amount of noise or grain to enhance the illusion of real film texture.
By carefully tweaking these settings, you can transform a digital image into something that feels like it was taken decades ago. Experiment with different combinations of these adjustments to find the perfect vintage style that suits your vision.
Adding Borders and Frames
One of the easiest ways to enhance the vintage atmosphere in your photos is by adding borders and frames that mimic classic film prints. This simple technique can instantly transport your images back in time, giving them the look of old Polaroids, analog film strips, or scrapbook-style layouts.
Using Polaroid or Old Film-Style Borders
Polaroid-style borders are a popular choice for creating a nostalgic feel. They not only add a retro touch but also give your photos a tangible, instant-camera aesthetic. Many editing apps and software offer built-in Polaroid frame options, but you can also create your own manually.
- Lightroom & Photoshop: You can add a white frame around your image and extend the bottom edge slightly to mimic a Polaroid-style border. Adding slight discoloration or texture to the frame enhances the realism.
- Mobile Apps: Apps like Instax Mini Link, Canva, and VSCO provide pre-made Polaroid and film-style frames, making it easy to apply them in just a few taps.
- Overlays & PNG Frames: If you want more customization, you can download vintage frame overlays or PNG files with transparent backgrounds and place them over your photos.
Creating a Scrapbook or Analog Feel with Framing Techniques
For an even more authentic vintage look, consider framing your images in a way that mimics old-school scrapbooks, negatives, or photo albums. Here are some ideas:
- Film Strip Frames: Add a black film strip border with sprocket holes to simulate the look of a 35mm film negative. This effect works well for storytelling and sequences of images.
- Torn or Worn Paper Edges: Use textured frames with rough, torn edges to give your photos a handmade, aged appearance.
- Tape & Sticky Notes: Some apps allow you to add digital tape, handwritten notes, or stickers to your images, replicating the feel of an old photo album.
- Faded or Yellowed Borders: Slightly discoloring the edges of your photo or adding a vignette effect can make it look like it has aged over time.
Adding borders and frames is a creative way to bring warmth and nostalgia to your photos. Whether you go for a Polaroid-inspired look or a vintage scrapbook aesthetic, these framing techniques help tell a story and make your images stand out with an old-school charm.
Conclusion
Bringing a vintage atmosphere to your photos is all about mastering the right editing techniques. From adjusting colors and adding film grain to experimenting with light leaks and vintage filters, each step helps create a nostalgic, timeless feel. By lowering contrast, applying fade effects, and using authentic film-inspired presets, you can transform any modern image into one that looks like it was taken decades ago.
Now it’s your turn to experiment! Try out these techniques on your own photos and see what works best for your unique style. Don’t be afraid to mix different adjustments, play with textures, and create something truly one-of-a-kind.
We’d love to see your results! Share your vintage edits in the comments below or let us know if you have any questions. Happy editing! 🎞✨