Photography is an ever-evolving art form that requires continuous learning and practice. Whether you are just starting your journey or have years of experience behind the lens, improving your skills is essential to capturing more compelling and visually striking images. Mastering fundamental techniques not only enhances your technical abilities but also refines your artistic vision, allowing you to express yourself creatively through your photos.
Both beginners and seasoned photographers can benefit from a strong foundation in essential techniques. Understanding how to manipulate light, compose a shot effectively, and fine-tune camera settings can make a significant difference in the quality of your images. These skills help you adapt to different environments, experiment with new styles, and develop a unique photographic voice.
In this article, we will explore ten essential techniques that can take your photography to the next level. From mastering the exposure triangle to discovering your personal style, these methods will provide you with the tools needed to enhance your craft. Whether you aim to capture breathtaking landscapes, striking portraits, or dynamic street photography, these techniques will equip you with the knowledge to create stunning images consistently. Let’s dive in!
Master the Exposure Triangle
When it comes to improving your photography skills, understanding the exposure triangle is one of the most essential steps. The exposure triangle consists of three fundamental elements: ISO, shutter speed, and aperture. These three settings work together to determine the brightness, sharpness, and depth of field in your photos. Mastering their balance will allow you to take full creative control over your images.
Understanding ISO
ISO refers to your camera sensor’s sensitivity to light. A lower ISO (e.g., 100 or 200) is ideal for bright conditions, producing a cleaner image with less noise. Higher ISO settings (e.g., 1600 or 3200) increase sensitivity, making it easier to shoot in low light but at the cost of increased grain or noise.
Example: If you’re shooting outdoors on a sunny day, an ISO of 100 or 200 will give you the best image quality. On the other hand, if you’re capturing an indoor event with dim lighting, you may need to raise the ISO to 800 or higher to brighten the image.
Shutter Speed and Its Impact
Shutter speed controls how long the camera’s sensor is exposed to light. Measured in fractions of a second (e.g., 1/500s, 1/100s), a faster shutter speed freezes motion, while a slower shutter speed allows for motion blur.
Example: If you’re photographing a fast-moving subject like a bird in flight, a shutter speed of 1/1000s or higher will help freeze the action. However, if you want to capture smooth, flowing water in a waterfall, a slower shutter speed like 1/10s or lower will create a dreamy effect.
Aperture and Depth of Field
Aperture refers to the size of the lens opening and is measured in f-stops (e.g., f/1.8, f/5.6, f/11). A wider aperture (lower f-number) lets in more light and creates a shallow depth of field, perfect for portrait photography. A narrower aperture (higher f-number) allows less light but keeps more of the image in focus, making it ideal for landscapes.
Example: If you’re taking a portrait and want a blurred background, setting your aperture to f/1.8 or f/2.8 will create a beautiful bokeh effect. For landscape photography, using f/11 or f/16 will ensure sharp focus across the entire scene.
Balancing the Exposure Triangle
Achieving the perfect exposure requires balancing ISO, shutter speed, and aperture based on lighting conditions and creative intent. If you adjust one setting, you may need to compensate with another. For example, increasing the shutter speed to capture fast action may require a higher ISO or wider aperture to maintain proper exposure.
Practical Scenarios:
- Bright daylight: Use a low ISO (100-200), fast shutter speed (1/500s or higher), and a medium aperture (f/8-f/11) to capture crisp details.
- Low-light environment: Increase ISO (800-3200), widen the aperture (f/1.8-f/4), and use a slower shutter speed if motion blur is acceptable.
- Night photography: Use a tripod, set a low ISO (100-400), keep the aperture wide (f/2.8-f/4), and use a slow shutter speed (1s or longer) to capture more light without introducing noise.
By understanding and mastering the exposure triangle, you can take full control of your camera settings and create high-quality, well-exposed images in any lighting condition.
Use the Rule of Thirds for Better Composition
One of the most fundamental techniques in photography is the Rule of Thirds. This simple yet powerful guideline helps you compose your shots in a way that is visually engaging and balanced. By dividing your frame into a 3×3 grid, with two horizontal and two vertical lines, you create nine equal sections. The idea is to place your subject or key elements along these lines or at their intersections, rather than centering them directly in the middle of the frame.
Definition and Importance of the Rule of Thirds
The Rule of Thirds isn’t a hard and fast rule—it’s more of a guideline, designed to help create dynamic, visually appealing images. By placing points of interest off-center, you allow for more “breathing room” in the composition, which encourages the viewer’s eye to move around the image. This technique leads to more balanced and harmonious photographs, preventing the composition from feeling static or overly predictable.
When your subject is centered in the frame, it can create a sense of symmetry, but it also tends to make the photo feel static or even boring. By applying the Rule of Thirds, you guide the viewer’s attention in a way that feels more natural, reflecting how we tend to view the world around us.
How It Enhances Visual Interest and Balance
Using the Rule of Thirds can significantly enhance the visual interest of your images. When you place your subject at one of the intersections or along the lines, it leads the eye in a natural flow. For example, placing a person or object off-center can create a sense of movement or direction. This draws the viewer’s attention not just to the subject but to the surrounding space as well, creating a more immersive experience.
Additionally, the technique helps you maintain balance. A well-composed image doesn’t feel “top-heavy” or “bottom-heavy” but instead has a sense of equilibrium, even if the subject isn’t centered. The spacing around the subject creates a more dynamic interaction between the subject and the background.
Demonstration Through Example Images
To better illustrate the Rule of Thirds in action, imagine a landscape photo where the horizon is placed along the lower horizontal line. The subject, such as a tree or a person, can be placed at one of the intersections of the grid. This not only makes the image feel more balanced but also allows for a sweeping view of the scenery, drawing the viewer’s eye through the entire photo.
In a portrait, you might place the subject’s eyes along the upper horizontal line, with the body or other elements aligned along the vertical lines. This composition creates a more dynamic image compared to a traditional centered portrait.
By practicing the Rule of Thirds and applying it to different types of photography—whether landscape, portrait, or street—you’ll begin to see how it can transform the way you approach composition, leading to stronger, more engaging images.
Experiment with Different Perspectives and Angles
One of the most effective ways to elevate your photography and create dynamic, eye-catching images is by experimenting with different perspectives and angles. Changing the viewpoint from which you capture a subject can completely alter the mood, composition, and storytelling of your photo. Whether you’re photographing a simple object or a vast landscape, how you approach the scene plays a huge role in the final result.
Why Shooting from Unique Angles Creates Dynamic Photos
Photographing from unusual angles gives your images a fresh and engaging look. It helps to break free from the conventional eye-level shots that can often feel static or predictable. By altering your viewpoint, you add depth, interest, and a sense of intrigue to your photos. Unique perspectives can also emphasize certain aspects of your subject, guide the viewer’s eye in creative ways, and even make ordinary scenes appear extraordinary.
Examples of Low-Angle, High-Angle, and Unconventional Perspectives
- Low-Angle Shots:
Shooting from a low angle, where you place your camera close to the ground and point it upwards, can make subjects appear larger, more powerful, or more dramatic. For example, photographing a tall building from the base or capturing a subject like a flower from below adds a sense of grandeur and importance. Low-angle shots can also highlight the sky or emphasize textures on the ground that are typically overlooked. - High-Angle Shots:
On the flip side, high-angle shots involve positioning the camera above the subject, often looking down. This perspective can make your subject appear smaller, more vulnerable, or simply allow you to capture a broader scene. High-angle shots are particularly effective when photographing people, animals, or architecture from above, giving the viewer a new view of the subject or environment. - Unconventional Perspectives:
There are no rules when it comes to finding unique perspectives. Consider shooting through objects like windows, glass, or frames to add layers and context to your photos. You can also experiment with reflections in water or mirrors, or use objects to obscure part of the subject for a more abstract or artistic effect. These creative approaches can add a sense of mystery and playfulness to your work.
Tips for Finding New Angles in Everyday Settings
- Get Down to Ground Level:
When photographing objects like flowers, pets, or everyday items, crouch down to their level or even lie on the ground. This simple shift in perspective can make a huge difference in the final image. - Look for Elevated Vantage Points:
Look for tall structures, balconies, or staircases that give you a chance to capture scenes from above. This perspective works great for urban photography, landscapes, and even crowd scenes. - Move Around Your Subject:
Don’t settle for the first angle you find. Walk around your subject, change your position, and look at it from different directions. Each move could reveal something interesting or unexpected. - Use Leading Lines to Guide the Eye:
Incorporate elements like roads, rivers, fences, or other natural or man-made lines to lead the viewer’s eye through your composition. Experiment with shooting along or against these lines to create more dynamic images. - Challenge Yourself with Uncommon Views:
Instead of always shooting eye-level, challenge yourself to shoot from places that feel unnatural or less intuitive. For example, try shooting from the floor while focusing on the ceiling or capturing reflections in puddles or windows. The more you step outside your comfort zone, the more unique your shots will be.
By embracing different perspectives and angles, you’ll not only improve your composition but also enhance the storytelling aspect of your photography. Don’t be afraid to get creative and push the boundaries of traditional viewpoints.
Pay Attention to Lighting Conditions
Lighting is one of the most crucial elements in photography, as it significantly impacts the mood, color, and sharpness of your images. Understanding how to use both natural and artificial light effectively can take your photos to the next level. Whether you’re shooting portraits, landscapes, or product photos, mastering lighting conditions is key to capturing stunning images.
The Impact of Natural and Artificial Light on Photography
Natural light, often referred to as available light, comes from the sun. It varies in intensity throughout the day and can create different effects depending on its direction, quality, and color temperature. Soft, diffused light (such as on an overcast day) can create flattering shadows and smooth textures, while direct sunlight can produce harsh shadows and high contrast.
Artificial light, on the other hand, can be manipulated more easily, making it ideal for controlling the lighting in your photos. It can come from various sources like lamps, LED lights, or studio lighting setups. The key advantage of artificial light is that it provides more consistency and allows you to shoot at any time of day.
Golden Hour vs. Blue Hour: When and How to Use Them
Two of the most popular times to shoot with natural light are the golden hour and the blue hour. Both offer unique lighting conditions that can add warmth and drama to your photos.
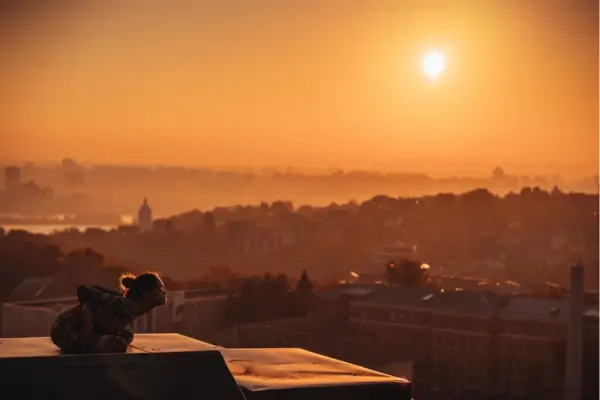
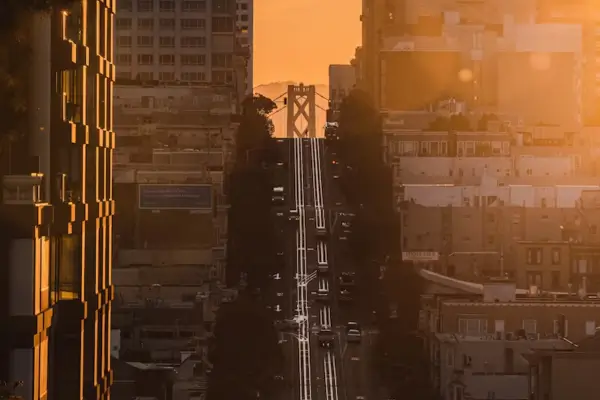
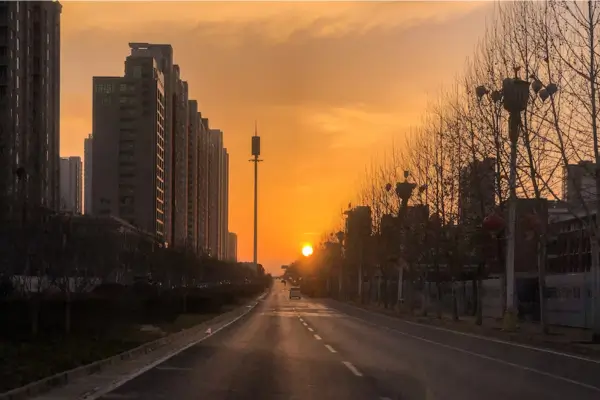
- Golden Hour: This occurs during the first hour after sunrise and the last hour before sunset when the sun is low in the sky. The light is soft and warm, producing long shadows and a golden glow that flatters most subjects, especially people and landscapes. It’s the perfect time for outdoor portraiture or capturing dreamy, atmospheric shots. How to use it: During golden hour, aim to shoot when the sun is still low but not directly in your frame. This ensures the light is diffused and creates a natural glow around your subject. Use the warm tones to highlight textures or add a nostalgic feel to your images.
- Blue Hour: The blue hour happens right before sunrise and after sunset, when the sun is below the horizon but the sky still retains a rich blue tone. The light is cool, offering a tranquil and dramatic atmosphere, which is ideal for night photography or cityscapes. How to use it: For blue hour photography, keep in mind that the light is low, so you’ll need a slower shutter speed or a tripod to avoid blur. This time is great for capturing architectural details, street scenes, or portraits with a moody feel.
How to Work with Harsh Lighting or Low-Light Situations
While golden and blue hours are ideal, you often have to work with harsh sunlight or low-light situations, especially if you’re shooting in midday or indoors. Here are a few strategies to make the most out of challenging lighting conditions:
- Dealing with Harsh Lighting:
- Use Diffusers: In bright sunlight, a diffuser can help soften harsh shadows and even out the light on your subject. If you don’t have a professional diffuser, a sheer white fabric or a piece of tracing paper can work as a makeshift solution.
- Find Shade: Moving your subject into the shade can provide softer light, helping to reduce overexposure and harsh contrasts. Look for shaded areas like under trees or awnings.
- Shoot During the Golden Hour: If possible, plan your shoots around the golden hour to avoid the harsh midday sun.
- Dealing with Low Light:
- Increase ISO: When shooting in low-light conditions, try increasing the ISO setting on your camera. This will make the sensor more sensitive to light, allowing you to use faster shutter speeds and avoid motion blur. However, be cautious not to raise the ISO too high, as this can introduce noise into your image.
- Use a Wider Aperture: A larger aperture (smaller f-number) allows more light to hit the camera sensor, which is especially helpful in dim environments. Use lenses with wide apertures (e.g., f/1.4, f/1.8) for better low-light performance.
- Consider a Tripod: For extremely low-light situations, a tripod can stabilize your camera during longer exposures, preventing camera shake and blurriness.
By paying attention to lighting and learning how to adapt to various conditions, you’ll enhance the mood, quality, and professionalism of your photos. Whether you’re working with the golden hour’s soft warmth or mastering the intricacies of artificial lighting, understanding how light works is essential to capturing breathtaking shots every time.
Improve Your Focus and Sharpness
One of the key elements that determine the quality of your photos is focus. A sharp, well-focused image can turn an ordinary scene into something striking, while a blurry photo can lose impact, regardless of composition or lighting. Whether you’re using autofocus or manual focus, understanding how to control focus effectively is crucial for producing crisp, clear images.
Autofocus vs. Manual Focus
Autofocus is the go-to feature for most modern cameras and lenses, and for good reason. It’s quick, convenient, and often accurate, especially for moving subjects. When you’re capturing a fast-paced scene, like sports or wildlife, autofocus ensures that the subject remains in sharp focus without needing to adjust settings constantly.
However, there are times when manual focus offers more control, particularly in more complex or challenging shooting situations. For example, when you’re shooting in low light, autofocus can struggle, and in macro photography, where fine detail is crucial, manual focus allows you to dial in precisely on the subject.
In general, autofocus works best when the subject is well-lit and the background isn’t cluttered. Manual focus is ideal when you’re looking to fine-tune your focus or deal with more intricate compositions.
Using the Right Focal Points and Depth of Field
Choosing the right focal point is essential for ensuring your subject stands out. When composing your shot, it’s important to decide which element of the scene you want to be the sharpest. For portraits, the eyes are typically the most critical area to focus on, as they draw the viewer’s attention. In landscape photography, focusing on elements that create a natural focal point, like a tree or mountain peak, can help guide the viewer’s eye through the image.
Depth of field (DOF) plays a significant role in controlling focus. A shallow depth of field, achieved by using a wide aperture (low f-number), blurs the background and foreground, isolating the subject and making it stand out. This technique is common in portrait photography, where you want to focus attention solely on the subject. On the other hand, a deep depth of field, which you get with a smaller aperture (high f-number), keeps both the foreground and background in sharp focus, perfect for landscapes or architectural shots.
Tips to Avoid Blurry Images
Blurry images often result from issues with focus or camera shake. Here are some tips to keep your photos sharp:
- Use a Tripod: When shooting in low light or at slow shutter speeds, a tripod stabilizes your camera, preventing shake. This is especially useful when you’re shooting in manual mode and need longer exposure times.
- Increase Your Shutter Speed: A faster shutter speed can help freeze motion and eliminate blur caused by movement, especially in action shots. As a general rule, your shutter speed should be at least the same as your focal length (e.g., for a 50mm lens, use a 1/50 second shutter speed or faster).
- Use the Right Focus Mode: Many cameras offer different autofocus modes, such as Single-Point, Continuous, and Auto. Choose the one that best suits your subject. For still subjects, Single-Point Focus works best, while Continuous Focus is ideal for moving subjects.
- Ensure Proper Lens Calibration: Sometimes, your lens might be slightly out of focus due to a miscalibration, resulting in blurry images. Regularly check the autofocus of your lens to ensure it’s aligned correctly.
- Steady Your Camera: If you don’t have a tripod, try holding the camera with both hands and keeping your elbows close to your body to minimize shake. If possible, lean against a wall or stable surface to steady yourself.
By mastering focus and sharpness, you’ll elevate the quality of your photography, ensuring that every shot is as crisp and clear as possible.
Understand White Balance for Accurate Colors
White balance is a crucial aspect of photography that directly influences the color accuracy in your images. It refers to the camera’s ability to adjust colors so that the image appears as natural as possible, with whites appearing truly white under various lighting conditions. Without proper white balance, your photos may have unnatural color tints, like a blue, yellow, or greenish cast.
What is White Balance and Why Does it Matter?
White balance works by compensating for the color temperature of the light in your environment. Color temperature is measured in Kelvin (K), and different light sources emit light at different temperatures. For example, the warm, yellowish light of a sunset has a low color temperature, while the cool, bluish light of daylight has a higher color temperature. If your white balance is off, the colors in your photos can look unnatural, making your whites appear yellow or blue, for example.
The goal of white balance is to adjust the colors in the photo so that white objects appear white, and all other colors are reproduced as accurately as possible. Proper white balance ensures that skin tones, skies, and all other elements look true to life, which is especially important when you’re trying to capture a natural scene or portrait.
Adjusting White Balance: In-Camera vs. Post-Processing
White balance can be adjusted both in-camera and during post-processing, with each method offering its advantages.
- In-Camera Adjustment:
Most modern cameras offer several preset white balance settings, including options for daylight, cloudy, tungsten, and fluorescent lighting. These presets help the camera automatically compensate for different light sources. For example, if you’re shooting indoors under artificial light, the “tungsten” setting will help remove the yellowish tint often caused by indoor lighting. You can also manually adjust the white balance using the custom setting, where you take a photo of a neutral gray or white object (like a gray card) under the same lighting conditions and let the camera set the correct white balance for you. - Post-Processing:
While adjusting white balance in-camera is important, sometimes the lighting conditions are unpredictable or change rapidly. In such cases, you can correct the white balance during post-processing using software like Adobe Lightroom or Photoshop. These programs give you more precise control over the color temperature and tint, allowing you to fine-tune the image and achieve perfect color balance. Post-processing is especially useful if you’re shooting in RAW format, as it gives you more flexibility in making adjustments without compromising image quality.
How Different Lighting Affects Color Temperature
Different light sources have distinct color temperatures that can affect how your photos look. Here’s how common light sources impact color:
- Daylight (around 5500K): This is considered neutral light, with no strong color cast. It produces the most accurate colors and is ideal for outdoor photography.
- Tungsten (Incandescent) Light (around 2800K): This produces a warm, yellow/orange light. It’s common in indoor lighting and can give photos a cozy, golden tone. To balance it, use the “tungsten” white balance setting on your camera.
- Fluorescent Light (around 4000K-5000K): Fluorescent lighting can add a greenish tint to your images. To correct for this, use the “fluorescent” preset or adjust the color temperature manually.
- Cloudy or Overcast Light (around 6000K-7000K): Cloudy skies have a cool, blueish tint. The “cloudy” preset on your camera will warm up the image to remove this blue cast.
- Flash (around 5500K): Flash light is similar to daylight and generally doesn’t require adjustments unless you’re mixing artificial lights with natural light.
Understanding the color temperature of different light sources allows you to better predict the kind of color cast your photos will have and make adjustments accordingly. By mastering white balance, you ensure that your images reflect the scene as it truly appeared to your eyes, with vibrant, accurate colors.
Learn to Use Leading Lines and Framing
One of the most powerful compositional tools in photography is the use of leading lines and framing. Both techniques help to guide the viewer’s eye to the main subject and create a sense of depth and balance in the image. Mastering these elements can elevate your photographs from ordinary to extraordinary, making them more engaging and visually appealing.
How Leading Lines Draw Attention to the Subject
Leading lines are any lines within the scene that naturally direct the viewer’s eye toward the main subject. These lines can be literal, like a road or a fence, or abstract, like a shadow or a row of objects. The key to using leading lines effectively is positioning them so they lead the viewer’s gaze in a smooth, natural flow toward the point of interest.
For example, a winding road in the distance, a river flowing toward a horizon, or even a series of stairs can serve as leading lines. These lines create a sense of movement and invite the viewer to follow them, leading them to the focal point of the image.
Creative Framing Techniques Using Natural Elements
Framing is another essential technique where you use elements in the scene to “frame” your subject, drawing attention to it. By carefully positioning natural elements like trees, windows, or doorways, you can create a sense of intimacy or focus on the subject while still allowing the environment to play a role in the composition.
For instance, shooting through an archway or a gap in the trees can isolate the subject while also incorporating the surrounding environment. This adds depth to the image and gives it a layered look. Framing not only helps highlight the subject but also adds context, making the photograph feel more immersive.
Examples of Effective Composition Using These Methods
- Leading Lines: Imagine a photo of a long, empty highway stretching through the desert landscape. The lines of the road converge toward a distant mountain range, drawing the viewer’s eye into the scene. The road is the leading line, and it not only directs attention but also emphasizes the vastness and isolation of the environment.
- Framing with Natural Elements: Consider a photograph of a waterfall taken through a gap in a rocky cliff. The rocks on either side create a natural frame around the falls, guiding the viewer’s attention toward the water while adding a sense of depth. The surrounding rocks provide context to the scene, showing that the waterfall is part of a larger, rugged landscape.
- Combined Use of Leading Lines and Framing: A beautiful example of using both techniques together could be a photo taken in a forest where the path (leading line) weaves through tall trees (the frame). The path draws the eye forward into the image, while the trees frame the composition, creating a balanced and dynamic photograph.
By incorporating leading lines and framing into your photography, you can transform an ordinary shot into something that’s visually compelling and well-composed. These techniques help create focus, enhance storytelling, and add a sense of dimension to your photos. Experiment with both to see how they change the way you approach your compositions!
Utilize Post-Processing for Final Touches
In the world of professional photography, post-processing plays a critical role in transforming a good shot into a great one. While capturing the perfect image in-camera is essential, editing allows you to enhance your photos, bringing out their true potential. This process allows photographers to refine their images, adjust colors, and correct minor imperfections, ensuring that the final result aligns with their creative vision.
Importance of Editing in Professional Photography
Post-processing is more than just fixing mistakes; it’s an opportunity to fine-tune your image and make it stand out. Whether you’re working with portraits, landscapes, or product photography, editing gives you full control over how your photos are perceived. It helps in adjusting exposure levels, correcting white balance, and enhancing colors to create mood and atmosphere.
Moreover, professional photographers often rely on post-processing to ensure consistency across their portfolio. By applying similar edits to a series of images, you can create a cohesive visual style that reflects your unique artistic approach. In today’s digital world, where images are constantly shared online, editing is essential for making your work look polished and marketable.
Basic Adjustments: Exposure, Contrast, and Color Correction
Three fundamental adjustments that every photographer should master in post-processing are exposure, contrast, and color correction. These adjustments are often the difference between a dull, flat image and one that’s vibrant and visually engaging.
- Exposure:
Adjusting exposure is one of the first steps in editing. Overexposed images can look washed out, while underexposed photos can be too dark to reveal fine details. Balancing the exposure ensures that your image retains all its details, from the brightest highlights to the darkest shadows. Most editing software offers a simple slider for exposure adjustment, but it’s important to avoid overdoing it, as excessive adjustments can result in unnatural-looking images. - Contrast:
Contrast refers to the difference between light and dark areas in your photo. Increasing contrast can make your subject pop, providing more depth and interest. However, too much contrast can lead to loss of detail in highlights and shadows. A good balance of contrast enhances the overall visual impact while maintaining detail in both light and dark areas. - Color Correction:
Color correction is crucial for ensuring that the colors in your image are accurate and visually appealing. White balance is a key factor in this process. Adjusting the white balance helps correct any color casts caused by different lighting conditions (e.g., warm yellow tones from indoor lighting). In addition, adjusting the vibrancy or saturation can make colors more vivid, or you can tone them down for a more subdued effect, depending on the mood you want to convey.
Recommended Software and Apps for Beginners and Advanced Users
When it comes to post-processing, choosing the right software can make all the difference in your workflow. Here are some of the best options for both beginners and advanced photographers:
- Adobe Lightroom:
Ideal for beginners and intermediate photographers, Lightroom offers a simple yet powerful set of tools for exposure, contrast, color correction, and more. It’s known for its non-destructive editing, meaning your original image remains untouched, and you can always revert to the original if necessary. Lightroom also provides batch editing, which is a time-saver for large photo collections. - Adobe Photoshop:
Photoshop is the industry standard for professional photographers. It offers comprehensive tools for detailed image manipulation, including advanced retouching, layer management, and masking. Photoshop is best suited for those who want to take their post-processing skills to the next level. While it has a steeper learning curve, the results are unmatched for those seeking complete creative control. - Capture One:
A favorite among advanced photographers, Capture One provides exceptional color grading tools and tethered shooting capabilities. It is known for its superior RAW image processing and is often preferred by studio photographers. While it’s more complex than Lightroom, it offers fine-tuned control over color, exposure, and other adjustments. - Snapseed (Mobile App):
For those who prefer editing on their smartphones, Snapseed is a fantastic free option. With its intuitive interface, it allows you to adjust exposure, contrast, and color while offering a variety of filters and tools. Snapseed is a great choice for photographers who want a mobile editing solution without sacrificing quality. - VSCO (Mobile App):
VSCO is another popular mobile editing app that combines ease of use with professional-grade features. It’s particularly well-known for its wide range of filters, which can give your images a unique look. While it doesn’t offer the same in-depth controls as Lightroom or Photoshop, it’s perfect for quick edits and sharing photos on social media.
Post-processing is an essential skill that every photographer should embrace. By mastering basic adjustments like exposure, contrast, and color correction, you can significantly enhance your images and develop a distinct photographic style. Whether you’re just starting or have years of experience, using the right software or app for your needs can make all the difference in the quality of your final images. With these tools at your disposal, the possibilities for creative expression are endless.
Practice Shooting in Manual Mode
Mastering manual mode is a crucial step in becoming a more confident and creative photographer. While automatic settings might work in a pinch, manual mode allows you to take full control of your camera’s settings, giving you the flexibility to capture exactly what you envision. With manual mode, you can adjust ISO, aperture, and shutter speed independently, enabling you to fine-tune exposure, depth of field, and motion blur to your liking. In this section, we’ll dive into why manual mode is so important, and how you can start using it effectively.
Why Manual Mode Gives You Full Creative Control
When you shoot in automatic or semi-automatic modes (like aperture priority or shutter priority), the camera makes decisions for you based on its preset algorithms. While these settings are helpful in many situations, they often don’t give you the exact control you need for more artistic or challenging shots. For example, the camera might overexpose or underexpose a scene, or fail to focus on the area you want to highlight.
In manual mode, you’re responsible for adjusting every setting to match the lighting, motion, and depth of field you desire. This creative freedom allows you to tell a story through your images by controlling how light interacts with your subject, how much motion is captured, and how the background and foreground elements are rendered.
Step-by-Step Guide to Setting ISO, Aperture, and Shutter Speed
To shoot in manual mode, you’ll need to adjust three primary settings: ISO, aperture, and shutter speed. Here’s a simple guide to get started:
1. Set Your ISO
- What it is: ISO controls the sensitivity of your camera’s sensor to light. A higher ISO is useful in low-light conditions, but can introduce noise or grain to your photos.
- How to adjust: Start with a lower ISO (e.g., 100 or 200) in bright light conditions. Increase the ISO (e.g., 800, 1600, or more) when shooting in darker environments.
- Tip: Always aim to use the lowest ISO possible to avoid noise, unless the lighting conditions demand higher sensitivity.
2. Adjust Your Aperture (f-stop)
- What it is: Aperture controls the size of the opening in your lens, which affects the depth of field. A wider aperture (lower f-stop number like f/1.8) lets in more light and creates a shallow depth of field, blurring the background. A smaller aperture (higher f-stop like f/16) lets in less light and keeps more of the scene in focus.
- How to adjust: Set a wider aperture for portraits (e.g., f/2.8 to f/5.6) to blur the background and make your subject stand out. Use a smaller aperture (e.g., f/8 to f/16) for landscapes to keep everything sharp.
- Tip: A good starting point for general use is around f/5.6 to f/8.
3. Set Your Shutter Speed
- What it is: Shutter speed controls how long your camera’s sensor is exposed to light. Faster shutter speeds (e.g., 1/500s) freeze motion, while slower shutter speeds (e.g., 1/30s or lower) allow movement, resulting in a blur effect.
- How to adjust: For fast-moving subjects like sports or wildlife, use faster shutter speeds (1/1000s or faster). For stationary subjects or creative effects, slower speeds (1/60s to 1/2s) can create motion blur or light trails.
- Tip: As a general rule, use a shutter speed of at least 1/125s for handheld shooting to avoid camera shake. If you’re using a tripod, you can go slower.
4. Balancing the Exposure Triangle
- The key to manual mode is finding the right balance between ISO, aperture, and shutter speed. If one setting is adjusted, you’ll need to adjust the others accordingly to maintain proper exposure. For example, if you lower the aperture to f/2.8 (letting in more light), you might need to increase the shutter speed to compensate and avoid overexposure.
Exercises to Build Confidence in Manual Shooting
Now that you understand the basics, here are a few exercises to help you build confidence in shooting manually:
1. Take Your Camera Outdoors
Go outside in varying light conditions (sunny, cloudy, dusk) and experiment with manual settings. Try adjusting your aperture to create different depths of field and observe how the lighting changes when you modify your ISO or shutter speed. Take note of how different settings affect your image.
2. Shoot Moving Subjects
Practice photographing moving subjects like cars, pets, or people walking. Start with a fast shutter speed to freeze the motion, then experiment with slower speeds to capture motion blur. Adjust your aperture to keep the focus on the subject or to blur the background.
3. Challenge Yourself in Low Light
Set your camera to manual mode and take photos in a dimly lit room. Adjust the ISO to compensate for the lack of light, and experiment with wide apertures to keep the subject illuminated while blurring the background.
4. Use a Light Meter
Many cameras have built-in light meters that display the exposure level in manual mode. Pay attention to the light meter as you adjust your settings to ensure you’re achieving proper exposure (a balanced meter reading). This will help you understand how the settings influence exposure in real time.
Switching to manual mode may seem intimidating at first, but with practice, you’ll gain full creative control over your photos. By mastering ISO, aperture, and shutter speed, you’ll be able to capture exactly what you see in your mind’s eye, no matter the lighting or movement. Remember, the more you practice, the more intuitive these settings will become, and you’ll quickly see the improvement in your photography.
Develop Your Unique Style and Vision
One of the most rewarding aspects of photography is discovering and refining your unique style. As you progress in your photography journey, it’s essential to develop a personal approach that resonates with your creative vision. This section explores how to cultivate your style by drawing inspiration from various photography genres, making intentional choices in editing and subject matter, and incorporating storytelling into your images.
Finding Inspiration from Different Photography Genres
Every photographer has a unique way of viewing the world, and often, your style will be influenced by the genres you explore. Whether you’re captivated by portrait photography, landscapes, street photography, or fine art, each genre offers distinct techniques and visual aesthetics. By studying different styles, you can identify elements that resonate with you and incorporate them into your own work.
- Experimenting across genres: Don’t limit yourself to one genre. Try capturing portraits, landscapes, or even abstract photos to see which aspects speak to your creative instincts. This exploration will help you figure out what excites you most and shape your personal approach.
- Study influential photographers: Look at the work of renowned photographers across various genres. Take note of how they use light, composition, and subject matter to evoke emotions or tell stories.
How to Create a Consistent Style Through Editing and Subject Choice
Once you’ve gained inspiration from different genres, it’s time to bring all the elements together to form a cohesive style. Consistency is key in photography, whether you’re shooting for a personal portfolio or professional work. Editing and subject choice play a crucial role in defining your style.
- Post-processing: Your editing style helps set the tone for your images. Whether you prefer vibrant, saturated colors or a more muted, monochromatic look, your editing choices will reinforce the mood of your photographs. Experiment with tools like Lightroom or Photoshop to find a color grading technique or set of adjustments that feels authentic to you.
- Subject matter: The types of subjects you choose to photograph can also contribute to your style. Some photographers gravitate toward urban scenes, while others prefer nature or close-up details. Whatever you focus on, consistency in your subject matter helps form a recognizable visual language.
The Importance of Storytelling in Photography
At the heart of every great photograph is a story. Photography is more than just capturing a scene—it’s about conveying emotions, narratives, and experiences. Developing your style also means honing your ability to tell compelling stories through your images.
- Emotional connection: Great photography often evokes emotion. Whether it’s the serenity of a quiet landscape or the energy of a bustling street scene, your photos should make viewers feel something. Think about the message you want to convey and how your subject, composition, and lighting can enhance that emotion.
- Context and narrative: Consider the context of your shots. What story is unfolding in the frame? How do the elements within the scene come together to tell that story? Strong compositions often involve more than just a subject in focus—they incorporate elements that create a sense of place and narrative.
As you develop your unique style, remember that it’s an evolving process. With time and experimentation, you’ll discover what truly represents your vision. Photography is a journey, and your style will naturally evolve as you grow, but embracing these foundational principles will help you create a more authentic and impactful body of work.
Conclusion
In conclusion, improving your photography skills requires a combination of knowledge, practice, and creativity. The 10 essential techniques we’ve discussed—mastering the exposure triangle, using the rule of thirds, experimenting with perspectives, and paying attention to lighting, among others—are foundational steps that every photographer should embrace to capture striking and professional-quality images.
Remember, practice is key. Take time to experiment with these techniques in different environments and with various subjects. Don’t be afraid to step outside your comfort zone and try new approaches. The more you shoot, the better your skills will become, and your unique style will start to emerge.
Additionally, joining photography communities, whether online or locally, can be a fantastic way to stay motivated and continue learning. By engaging with other photographers, sharing your work, and receiving constructive feedback, you can accelerate your growth and gain valuable insights into new trends and techniques. Keep exploring, keep practicing, and let your creativity lead the way!