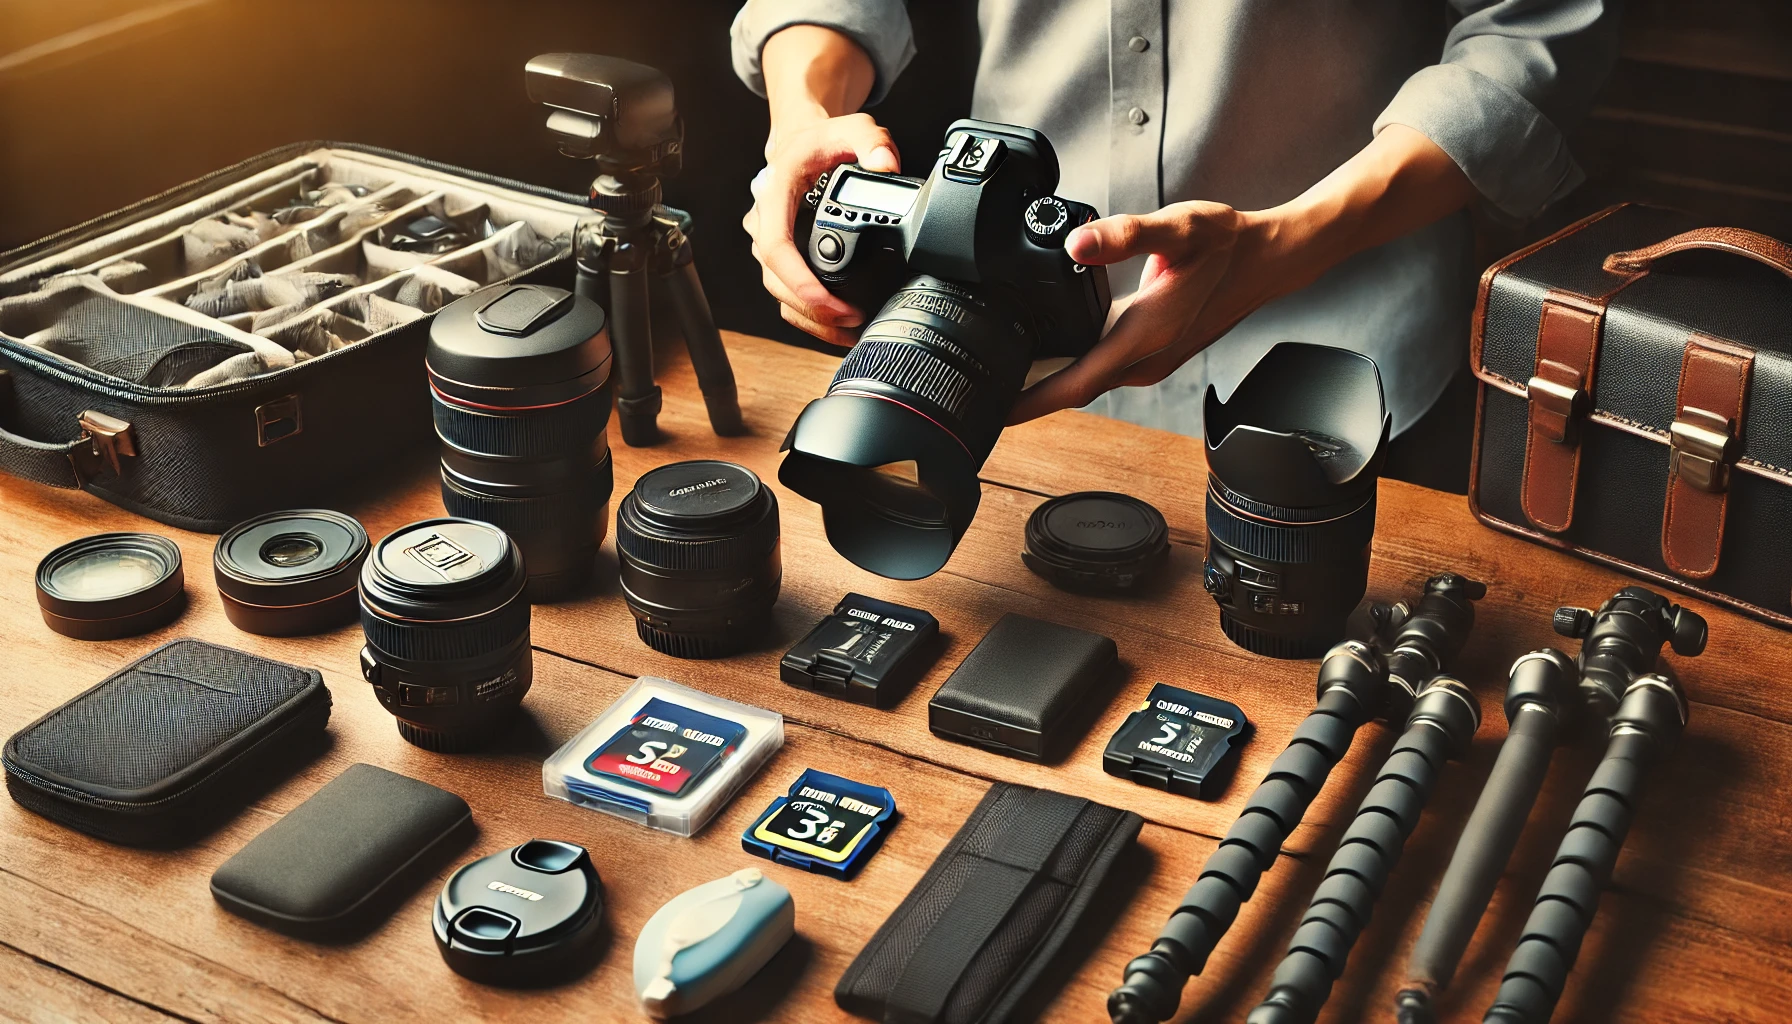
Photography has become more than just a hobby for many—it’s now a way of expressing creativity, capturing memories, and even building a career. With the rise of social media and digital platforms, photography has gained immense popularity, and countless people are now investing in cameras, equipment, and accessories to enhance their skills.
While a great camera is essential, the right accessories can truly elevate your photography game. They can help you achieve sharper images, better lighting, and more creative effects. Whether you’re shooting landscapes, portraits, or action shots, accessories are key to making the most of your gear and pushing your skills further.
Choosing the right accessories depends largely on your photography style and needs. Some accessories are perfect for those focused on outdoor landscapes, while others are designed to assist portrait photographers in creating stunning compositions. Understanding what works best for your unique style is the first step toward enhancing your overall photographic experience.
Camera Strap: Comfort and Functionality
A high-quality camera strap may seem like a small accessory, but it plays a significant role in improving both the comfort and functionality of your photography experience. Whether you’re shooting a portrait session, a landscape, or on the move during an event, a comfortable strap makes a big difference during long shoots. Without a proper strap, carrying your camera around for hours can strain your neck, shoulders, and wrists, which ultimately impacts your shooting ability and enjoyment.
Types of Camera Straps
- Neck Straps: One of the most common options, neck straps offer a straightforward way to carry your camera around your neck. They are adjustable and allow for easy access to your camera while shooting. However, they can sometimes cause discomfort if the camera is heavy or if worn for extended periods. If you plan on doing a lot of walking or standing with your camera, a padded neck strap can provide extra comfort.
- Sling Straps: Sling straps are becoming increasingly popular due to their versatility and comfort. Designed to be worn diagonally across your body, they allow you to easily slide the camera from your side to your front without having to remove the strap. This makes it quicker to capture spontaneous shots. Sling straps are often padded for added comfort and can distribute the weight more evenly across your shoulder, reducing strain.
- Wrist Straps: Wrist straps are ideal for photographers who prefer to keep their hands free while still securely holding their camera. This option is best for lightweight cameras or when you’re shooting in situations where you need to quickly grab and release the camera. While wrist straps don’t provide as much weight distribution as neck or sling straps, they give excellent freedom of movement.
Benefits for Stability and Convenience
Beyond comfort, a good camera strap offers stability and convenience while shooting. A strap ensures that your camera is securely attached to you, reducing the risk of accidental drops, especially in crowded or dynamic environments. With a well-positioned strap, you don’t have to worry about constantly holding your camera, which can lead to hand fatigue during long sessions.
Moreover, the ability to quickly adjust your camera’s position or access it for spontaneous shots is another huge benefit. Whether you need your camera ready for quick action or want to free your hands while waiting for the perfect moment, the right strap can make a significant difference in your shooting efficiency.
In conclusion, investing in a comfortable and functional camera strap enhances both your shooting experience and your results. Whether you choose a neck, sling, or wrist strap, the key is finding the one that works best for your style and needs.

Tripod: Stability for Perfect Shots
A tripod is one of the most essential accessories for any photographer, offering stability and control to capture sharp, steady images. Whether you’re shooting in low light, experimenting with long exposure techniques, or capturing the perfect landscape, a tripod helps eliminate camera shake, ensuring that your photos remain crisp and clear.
When you’re holding your camera by hand, even the smallest movement can result in blurry images, especially in situations where the shutter speed is slower. A tripod acts as a sturdy foundation for your camera, allowing you to focus on your composition without worrying about stability.
Different Types of Tripods
Not all tripods are created equal, and choosing the right one depends on your shooting needs. Here are some common types of tripods:
- Lightweight Tripods: These are designed for photographers who prioritize portability. Perfect for travel or casual shoots, lightweight tripods are easy to carry around but may lack the stability required for heavy camera setups. They’re ideal for beginner photographers or those who need a compact option for quick shots.
- Travel Tripods: Travel tripods are a versatile option that balances lightweight design with stability. Many travel tripods are compact, foldable, and easy to pack, making them a great choice for photographers on the go. They often feature adjustable legs and can extend to varying heights, offering flexibility for different shooting angles.
- Heavy-Duty Tripods: If you shoot with professional equipment or need ultimate stability for specialized techniques (like long-exposure photography), a heavy-duty tripod is the way to go. These tripods are built to support larger cameras and lenses while ensuring maximum stability even in windy conditions. While they can be bulkier, they provide superior performance and durability.
Use Cases for Tripods
- Long-Exposure Shots: When photographing in low-light environments or capturing nighttime scenes, longer exposure times are required. Without a tripod, even slight camera movements can ruin the shot. A tripod ensures that your camera remains perfectly still, allowing you to capture those beautiful, elongated light trails or silky-smooth waterfalls.
- Landscape Photography: Landscape photography often involves wide-angle shots with minimal movement. Using a tripod helps to frame your shot accurately and eliminates camera shake. It also allows you to experiment with different exposure times to achieve the perfect light, depth, and detail in your photos.
- Portraits: While you might not always need a tripod for portraiture, it can be incredibly helpful for controlled studio setups or group portraits. It allows you to keep the camera steady at a precise angle, and if you’re using off-camera flash or additional lighting, a tripod ensures that your camera’s position remains constant throughout the shoot.
In conclusion, investing in a high-quality tripod can greatly enhance your photography by offering stability, flexibility, and creative control. Whether you’re capturing sweeping landscapes, shooting long exposures, or perfecting portrait compositions, a tripod is a must-have tool to elevate your images to the next level.
Lens Filters: Enhance Your Shots
Lens filters are an essential accessory for photographers looking to take their images to the next level. These simple yet powerful tools can dramatically improve the quality of your shots, whether you’re capturing landscapes, portraits, or action shots. There are several types of lens filters, each serving a unique purpose to enhance different aspects of your photography. Let’s take a closer look at the most popular types of filters and how they can benefit your images.
Types of Lens Filters
UV Filter
The UV filter is one of the most common filters used by photographers. Traditionally, it was designed to block ultraviolet light, which could cause haziness and a bluish cast in outdoor photography. While digital cameras typically have built-in UV protection, many photographers still use UV filters as a protective layer for their lenses. These filters are excellent for preventing scratches, dust, and dirt from damaging the lens, all while offering minimal impact on image quality.
Polarizing Filter
A polarizer is an incredibly versatile filter, ideal for improving contrast and enhancing the colors in your shots. It works by reducing reflections and glare from non-metallic surfaces like water, glass, and wet surfaces, giving you cleaner, more vibrant images. Polarizing filters also enhance the blue of the sky and the green of foliage, making them a popular choice for landscape photographers. Additionally, they help saturate colors, creating more vivid and striking images in outdoor scenes.
Neutral Density (ND) Filter
A Neutral Density filter is a must-have tool for photographers who love to play with long exposures. ND filters reduce the amount of light entering the camera without affecting color balance. This is particularly useful in bright conditions, where you might want to achieve a slow shutter speed to create motion blur or capture smooth, flowing water in a landscape shot. ND filters come in various strengths, and the stronger the ND filter, the longer the exposure time you can use. These filters are essential for photographers aiming to get creative with lighting and exposure, especially in bright sunlight.
How Each Filter Improves Image Quality
Each type of lens filter offers distinct benefits to improve your photography:
- UV Filter: Primarily used for lens protection, UV filters provide an extra layer of defense against scratches and dust without affecting image quality. They are especially useful for travel and outdoor photography.
- Polarizing Filter: Polarizers cut down on reflections, making images sharper and clearer. They also enhance the colors in your photos, making skies bluer and foliage greener. This filter is indispensable for landscape photographers seeking deep, vibrant colors and high contrast.
- Neutral Density (ND) Filter: ND filters are ideal for controlling exposure in bright light conditions. By reducing the light entering the lens, they allow photographers to use slower shutter speeds or wider apertures, resulting in better control over depth of field and motion blur effects.
When and Why to Use Them
- UV Filter: You should always have a UV filter on your lens for added protection, especially when shooting in environments where dust, sand, or moisture could damage your gear. While not essential for image quality, it’s a simple and cost-effective way to safeguard your equipment.
- Polarizing Filter: Use a polarizer when shooting in bright outdoor settings, especially when there’s a lot of reflective surfaces like water or glass. It’s also a go-to filter for landscape photography to deepen colors and reduce glare from the sun. Keep in mind that polarizers can reduce the amount of light entering the lens, so they’re best used in well-lit conditions.
- Neutral Density (ND) Filter: When you want to create long-exposure shots during the day, or when you’re photographing subjects like waterfalls or oceans where you want smooth, flowing water, ND filters are your best friend. They allow you to experiment with exposure times without overexposing the image. ND filters are also helpful in portrait photography, where you want to create a shallow depth of field but are limited by bright ambient light.
Final Tips
- Always choose the right filter strength for your needs. Using a filter that’s too strong might result in underexposed images, so make sure to experiment and adjust accordingly.
- Clean your filters regularly to avoid dust and smudges, which can affect image clarity.
- While filters can improve image quality, they can also add some weight to your camera gear, so consider the trade-offs before adding extra filters to your setup.
By incorporating the right lens filters into your photography kit, you can enhance the colors, reduce glare, control exposure, and protect your lens, all of which contribute to capturing stunning, professional-quality images.
External Flash: Lighting Control
Lighting is one of the most crucial elements in photography. It can make or break an image, affecting everything from exposure to mood. While natural light is often preferred, controlled artificial lighting can give photographers the flexibility to create the perfect shot in any environment. This is where an external flash becomes an invaluable tool.
Advantages of an External Flash Over Built-In Camera Flash
Many cameras come with a built-in flash, but while convenient, it often falls short in delivering the quality of light needed for professional-looking photographs. Here’s why an external flash is a better option:
- Greater Power and Versatility: External flashes provide significantly more light output than built-in flashes, allowing for brighter images even in low-light settings. This is especially helpful in indoor photography or at night when you need extra illumination.
- Better Control of Direction: Unlike the built-in flash, which shoots light directly at the subject, an external flash allows you to direct the light. You can bounce the flash off walls or ceilings, or angle it to create softer, more flattering lighting, reducing harsh shadows.
- Customizable Settings: External flashes typically offer more advanced settings for adjusting power, zoom, and other aspects of the light. This level of control is crucial when working with different subjects and environments, allowing for more professional results.
- Reduced Red-Eye and Harsh Shadows: The direct flash from a built-in camera often results in red-eye and harsh, unflattering shadows. With an external flash, you can angle the light to eliminate these issues and create a more natural-looking effect.
Options for Diffusers, Softboxes, and Bounce Techniques to Create Natural Lighting Effects
Even with an external flash, the key to good lighting is soft, even illumination. Luckily, there are several accessories and techniques to help diffuse and control the light, resulting in more flattering and natural-looking photos:
- Diffusers: A diffuser is a simple accessory that softens and spreads out the flash light. It helps to reduce the harshness of the light and minimize shadows, providing a softer look. You can attach small diffusers directly to your external flash or use larger, more advanced models that cover a broader area.
- Softboxes: Softboxes are larger modifiers that help to create a broad, diffused light source. They are often used in portrait photography because they produce soft, flattering light on the subject’s face, making it ideal for close-up or studio shots. While more cumbersome than diffusers, softboxes are excellent for controlling lighting in a more dramatic or studio-style setup.
- Bounce Techniques: One of the most effective techniques for creating natural-looking lighting is bouncing your flash off surfaces such as walls, ceilings, or reflectors. By angling the flash to bounce off these surfaces, you create softer, more diffuse light that mimics the effect of natural light. This technique is especially useful in indoor settings where you might not want to overwhelm the scene with direct light.
Incorporating an external flash into your photography workflow opens up a world of creative possibilities. With the right accessories and techniques, you can transform harsh, unflattering lighting into soft, professional-quality illumination that enhances your images.
Lens Cleaning Kit: Maintain Image Quality
Keeping your lenses clean is one of the simplest yet most effective ways to ensure sharp, clear photos. Dirt, fingerprints, and smudges on your lens can seriously affect the quality of your images, leading to blurry shots, unwanted spots, and overall poor image clarity. Regularly cleaning your lenses not only improves photo quality but also helps prolong the lifespan of your gear.
What Should Be Included in a Lens Cleaning Kit?
A well-equipped lens cleaning kit will have everything you need to safely maintain your lenses without risking damage. Here’s what you should look for:
- Brushes: A soft-bristled brush, like a blower brush, is essential for gently removing dust and particles from the lens surface. It prevents scratches that might occur if debris is left to rub against the lens.
- Microfiber Cloths: These cloths are perfect for wiping the lens without leaving lint or scratches. They are designed to lift off fingerprints, smudges, and oils with ease, providing a streak-free finish.
- Cleaning Solution: A specially formulated lens cleaning solution helps break down oils and dirt that can’t be removed by dry cleaning alone. Avoid household cleaners as they can be too harsh for delicate lens coatings.
- Lens Pen: This dual-ended tool features a brush on one side for removing dust and a cleaning pad on the other, perfect for stubborn smudges.
- Wet Wipes: For times when a deeper clean is necessary, pre-moistened lens wipes can be convenient for quick touch-ups. Always choose wipes designed specifically for optics.
How to Safely Clean Your Lenses Without Damaging Them
Proper technique is key to avoiding damage when cleaning your lenses. Follow these steps for a safe and effective cleaning process:
- Blow Off Loose Dust: Start by gently blowing off any loose dust or dirt from the lens surface using a blower. This will reduce the risk of scratching the lens during the cleaning process.
- Use a Soft Brush: After blowing off the dust, use a soft brush to remove any remaining particles. Always brush in a circular motion to avoid pushing dirt into the lens coating.
- Apply Cleaning Solution to the Cloth, Not the Lens: Spray a small amount of lens cleaning solution onto a microfiber cloth, not directly onto the lens. This prevents the liquid from seeping into the edges of the lens or camera body.
- Wipe in a Circular Motion: Gently wipe the lens in a circular motion, starting from the center and working your way out. This method helps avoid pushing dirt around and creating smudges.
- Use a Dry Cloth for Final Touches: Once the lens is clean, use a dry section of the microfiber cloth to remove any remaining moisture and ensure a streak-free finish.
By incorporating a proper lens cleaning routine, you’ll preserve the image quality of your photos and keep your gear in top condition. With the right tools and technique, maintaining a clean lens is quick, easy, and crucial for every photographer.
Camera Bag: Protection and Organization
A camera bag is more than just a carrying case; it’s an essential accessory that keeps your gear safe, organized, and easily accessible. Whether you’re a professional photographer or a hobbyist, a durable, well-organized camera bag can make all the difference in your shooting experience.
Why You Need a Camera Bag
Photography gear can be delicate and expensive, which is why protecting it during transport is critical. A camera bag provides cushioning to prevent damage from bumps or drops, while also offering compartments to organize your lenses, camera bodies, flashes, and accessories. Without a dedicated bag, your equipment may become disorganized, leaving you scrambling to find the right lens or memory card when you need it most.
Types of Camera Bags
There are several types of camera bags to suit different needs and preferences. Let’s take a look at the most common options:
- Backpacks
Camera backpacks are a favorite among photographers who need to carry a lot of gear. They provide ample space and multiple compartments for organizing everything from cameras and lenses to batteries and memory cards. The two shoulder straps distribute the weight evenly across your back, making them ideal for long shoots or travel photography. Some backpacks even come with removable dividers, allowing you to customize the layout based on your gear. - Shoulder Bags
Shoulder bags are a classic choice for photographers who prefer easy access to their gear without having to take the bag off their shoulder. These bags usually offer a compact design and are great for carrying lighter setups or a few essential items. They are ideal for quick outings, street photography, or when you need a more discreet, casual look. - Sling Bags
Sling bags combine the portability of shoulder bags with the comfort of backpacks. Designed to be worn across the body, sling bags allow you to easily swing the bag from your back to your front for quick access to your camera and lenses. They are perfect for photographers who need to be agile and often shoot in crowded environments. These bags are usually smaller but still provide enough room for a camera body and one or two lenses.
Choosing the Right Camera Bag
When selecting a camera bag, consider both your gear and your comfort. Here are a few factors to help guide your decision:
- Amount of Gear:
The first thing to think about is how much gear you need to carry. If you’re shooting with just one camera body and a lens, a small shoulder bag or sling bag might suffice. However, if you carry multiple lenses, a flash, and other accessories, you’ll need a larger backpack with plenty of compartments to keep everything organized. - Comfort:
Comfort is key, especially for long photo sessions or travel. Look for a bag with padded straps, a breathable back panel, and adjustable shoulder straps to ensure a good fit. Backpacks tend to offer the most support for heavy loads, while sling bags are better for those who need quick access to their gear but are carrying lighter setups. - Durability and Weather Protection:
You want a camera bag that can withstand the elements and last for years. Look for bags made from weather-resistant materials like nylon or canvas, and consider those with additional rain covers for extra protection against rain or snow. - Accessibility:
How easy is it to access your gear? If you’re constantly on the go, choose a bag with easy-to-reach pockets or one that opens fully, allowing you to grab your camera quickly. Quick-access side pockets or top openings are great for photographers who need fast access to their gear during shoots.
In the end, the right camera bag will depend on your specific shooting style, the amount of gear you carry, and your comfort needs. Investing in a high-quality camera bag ensures your gear stays safe, organized, and ready for action, making your photography experience more enjoyable and efficient.
Remote Shutter Release: Avoid Camera Shake
When it comes to capturing the perfect shot, even the smallest camera shake can ruin an image, especially in situations requiring long exposure or extreme precision. This is where a remote shutter release becomes an invaluable accessory for photographers. By allowing you to trigger the camera without physically touching it, a remote shutter release helps eliminate any movement that could blur your shot, ensuring your images remain crisp and sharp.
Types of Remote Shutter Releases
There are two main types of remote shutter releases to choose from: wired and wireless.
- Wired Remote Shutter Release: This type connects directly to your camera via a cable, providing a simple, reliable option for triggering your shutter. Wired releases are typically more affordable and don’t rely on battery power, making them a great choice for photographers on a budget or those who want to avoid additional charging requirements. However, the cable can sometimes limit your movement or get in the way.
- Wireless Remote Shutter Release: For added convenience, the wireless option allows you to trigger your camera from a distance without any physical connection. This can be particularly useful for shooting from angles that are hard to reach or when you want to avoid any distractions from a cable. Wireless releases typically use infrared or radio signals to communicate with the camera, offering more freedom in how and where you shoot.
Why You Need a Remote Shutter Release
This accessory is essential in situations where camera shake is most likely, such as long exposure photography or macro photography.
- Long Exposure Photography: When you’re shooting long exposures, even the slightest movement can lead to blurry images. A remote shutter release ensures that you can trigger your camera’s shutter without causing any vibrations, allowing for longer exposure times without compromising image quality. This is especially important for capturing smooth, motionless scenes like flowing water, city lights at night, or the stars in the sky.
- Macro Photography: In macro photography, where you’re shooting extremely close-up details, camera shake is even more noticeable due to the shallow depth of field. A remote shutter release eliminates the risk of disturbing the setup, ensuring sharp focus and precision in every shot. Whether you’re photographing insects or delicate textures, this accessory gives you the control you need for flawless results.
In short, a remote shutter release is a simple yet powerful tool that greatly enhances your ability to capture clear, sharp images, particularly in situations that demand precision and stability.
Extra Batteries and Memory Cards: Never Run Out of Power or Space
When you’re out in the field, whether you’re capturing a beautiful sunset, a fast-moving subject, or an event with multiple moments to capture, running out of power or storage can be a photographer’s worst nightmare. That’s why having extra batteries and memory cards is crucial for uninterrupted shooting, especially during long photo sessions or when traveling. These accessories ensure you’re always ready to capture that perfect shot without the frustration of downtime.
Why Having Extra Batteries and Memory Cards is Crucial
Your camera’s battery life can vary depending on several factors like usage, screen brightness, and whether you’re using Wi-Fi or GPS. It’s easy to underestimate how quickly you’ll run out of power, especially if you’re shooting continuously or using features like live view or video recording. Similarly, memory cards can fill up faster than expected, particularly when shooting high-resolution images or 4K videos. Without extra power or storage, you could miss a key moment in your shoot.
Having extra batteries and memory cards on hand ensures you’re prepared for any situation, letting you focus on your creativity and not on worrying about your gear.
Recommendations for High-Capacity and High-Speed Memory Cards
When selecting memory cards, it’s essential to choose those with high read/write speeds and large storage capacities to avoid any slowdowns or storage issues. UHS-I and UHS-II SD cards are excellent choices for most photographers. These cards offer fast write speeds, reducing the time it takes to save files and ensuring that you don’t miss a shot.
- SanDisk Extreme Pro and Lexar Professional 2000x are popular, reliable options that offer both speed and high capacity. These cards are known for their ability to handle 4K video and burst-mode photography without issue.
- For those shooting in higher resolutions (like 50MP or higher), consider CFexpress cards for their superior speed and storage capacity.
The size of the memory card depends on how much you plan to shoot. A 128GB or 256GB card offers a good balance between ample space and cost, while 512GB or 1TB cards are ideal for heavy shooters or those recording videos in 4K and beyond.
Tips for Managing Storage and Battery Life During Long Shoots
- Battery Management: Always carry at least one extra battery per day of shooting. If you’re going on a long shoot or traveling, consider investing in a battery grip that can hold multiple batteries at once. Keep batteries in a dedicated, insulated pouch to protect them from extreme temperatures, which can shorten their lifespan.
- Optimize Battery Usage: Reduce power consumption by turning off your camera’s LCD screen when not in use, disabling Wi-Fi, and lowering the brightness. When shooting outdoors, use your camera’s power-saving modes to extend battery life.
- Memory Card Management: Organize your memory cards by labeling them or carrying multiple smaller cards rather than one large one. This way, if a card becomes corrupted, you won’t lose all your shots. Also, regularly offload your photos onto an external hard drive or cloud storage to free up space. If you’re using multiple cards, keep them in a protective case to avoid physical damage.
By preparing for these challenges in advance, you’ll ensure a smooth shooting experience and the ability to focus on what truly matters: capturing the perfect shot.
This section emphasizes the importance of extra power and storage in photography, offering practical advice on selecting the right accessories and managing them during shoots.
Lens Hood: Protect Your Lens and Improve Image Quality
A lens hood is a simple yet highly effective accessory that often gets overlooked by many photographers. Its main purpose is twofold: to protect your lens and to improve the overall quality of your images.
Protection for Your Lens
One of the key functions of a lens hood is to act as a physical barrier between your lens and potential hazards. Whether you’re shooting outdoors, in crowded spaces, or even in studio settings, the lens hood provides an extra layer of defense against bumps, scratches, and other impacts that could damage your lens. It helps shield your lens from accidental contact with objects, preventing costly repairs or replacements.
Reducing Lens Flare
Lens flare can be a major issue, especially when shooting in bright lighting conditions or facing a strong light source. It happens when stray light enters the lens and bounces off internal elements, creating unwanted reflections or halos in your photos. Not only does this reduce contrast and detail, but it can also distract from the subject of your image.
A properly fitted lens hood helps reduce lens flare by blocking stray light from entering the lens at sharp angles. This is particularly helpful when you’re shooting outdoors, during sunrise or sunset, or when capturing images with the sun in or near the frame. By using a lens hood, you’ll maintain better contrast, sharper images, and avoid the undesirable washed-out effect caused by lens flare.
Importance in Different Lighting Conditions
In certain lighting conditions, the presence of a lens hood can make all the difference. For example, in bright, sunny environments, the lens hood can effectively block direct sunlight from hitting the lens at an angle, allowing for cleaner, more vibrant photos. When shooting landscapes or portraits with natural light, a lens hood helps you capture rich, detailed shots without compromising on exposure or image quality.
On the other hand, when shooting in low-light conditions or indoors, a lens hood might not be as critical, but it still offers the added benefit of protection against accidental damage, especially when you’re maneuvering around tight spaces or in close quarters.
Incorporating a lens hood into your photography gear is a simple yet essential step in protecting your investment and ensuring high-quality images. Not only does it safeguard your lens from physical harm, but it also helps minimize lens flare, resulting in sharper, more vibrant photos in various lighting conditions. Whether you’re shooting outdoors or indoors, using a lens hood is a must-have accessory for any photographer looking to enhance their image quality and lens longevity.
Conclusion
In summary, the right accessories can make a significant difference in your photography journey. From camera straps that enhance comfort to tripods that ensure stability, each of the must-have accessories we discussed plays a crucial role in elevating your shots. Lens filters, external flashes, and lens cleaning kits can help you achieve better image quality, while items like camera bags and remote shutter releases offer both protection and convenience. Extra batteries and memory cards ensure you never miss the perfect shot, and a lens hood protects your gear while improving overall image quality.
When choosing your accessories, it’s essential to invest in tools that complement your personal photography style. Whether you’re a landscape photographer, portrait enthusiast, or a budding macro photographer, the right gear can help you unlock new creative possibilities.
Lastly, don’t forget to test and experiment with different accessories. Every photographer has unique preferences, and the best way to discover what works for you is through hands-on experience. So, start exploring, and you’ll soon find the perfect set of accessories that help you capture stunning photos with ease.