Lighting is one of the most crucial elements in photography, and natural light is a powerful tool that can transform an ordinary shot into something truly stunning. Unlike artificial lighting, which requires additional equipment and adjustments, natural light is readily available and can create beautifully soft, warm, and dynamic effects when used correctly.
Understanding how to work with natural light can significantly improve the quality of your photos, helping you achieve the perfect balance of brightness, contrast, and mood. Whether you’re capturing landscapes, portraits, or still-life photography, knowing when and how to use natural light can make all the difference.
In this article, you’ll learn how to harness the power of natural light to elevate your photography skills. We’ll explore the best times to shoot, techniques for different lighting conditions, essential camera settings, and common mistakes to avoid. By the end, you’ll have a solid foundation to start using natural light effectively and creatively in your photography.
Understanding Natural Light in Photography
What is Natural Light in Photography?
Natural light refers to any light source that comes from nature, primarily the sun. Unlike artificial lighting, which includes lamps, LEDs, and flash units, natural light changes throughout the day, offering a variety of tones and intensities. It can be soft and diffused on a cloudy day or harsh and direct under the midday sun. Mastering natural light allows photographers to create stunning images without relying on external lighting equipment.
The Difference Between Natural and Artificial Light
The key distinction between natural and artificial light lies in their source and behavior:
- Natural Light: Comes from the sun and varies in color temperature, intensity, and direction throughout the day. It requires photographers to adapt to changing conditions and make creative use of available light.
- Artificial Light: Includes studio lights, LED panels, and flash units, which provide controlled, consistent illumination. While artificial light allows for precise adjustments, it can sometimes feel unnatural compared to the organic look of sunlight.
Both types of lighting have their place in photography, but natural light offers a unique and dynamic quality that enhances images without the need for extensive equipment.
Advantages of Using Natural Light for Photography
- Cost-Effective – Unlike artificial lighting setups, which require investments in gear like flashes, softboxes, and light stands, natural light is completely free and accessible to anyone.
- Creates a Natural and Authentic Look – Sunlight enhances skin tones, adds depth to landscapes, and brings out the textures in objects in a way that feels organic and visually pleasing.
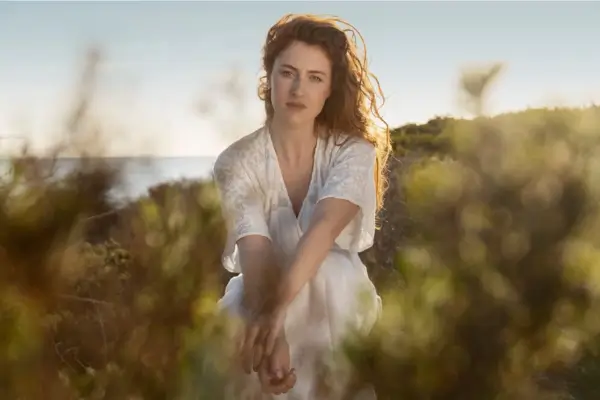
- Dynamic and Versatile – Throughout the day, natural light shifts in color and intensity, offering a wide range of creative possibilities, from warm golden hour portraits to dramatic backlit silhouettes.
- Easier to Work With for Beginners – Learning to harness natural light teaches photographers fundamental lighting techniques, such as positioning, exposure, and shadow control, before investing in artificial lighting equipment.
- Encourages Creativity – Since natural light changes with time and weather, photographers are challenged to adapt, experiment, and discover unique compositions that artificial lighting might not easily replicate.
By understanding and utilizing natural light effectively, photographers can elevate their work, capturing stunning images with minimal equipment while embracing the beauty of natural illumination.
Best Times to Shoot: Mastering the Golden and Blue Hours
Lighting plays a crucial role in photography, and knowing the best times to shoot can make a significant difference in the quality of your images. Two of the most magical times for natural light photography are the Golden Hour and the Blue Hour. These short yet powerful windows of time provide soft, dynamic lighting that enhances the mood, depth, and overall aesthetic of your photos.
Golden Hour: Soft, Warm Light for Stunning Portraits and Landscapes
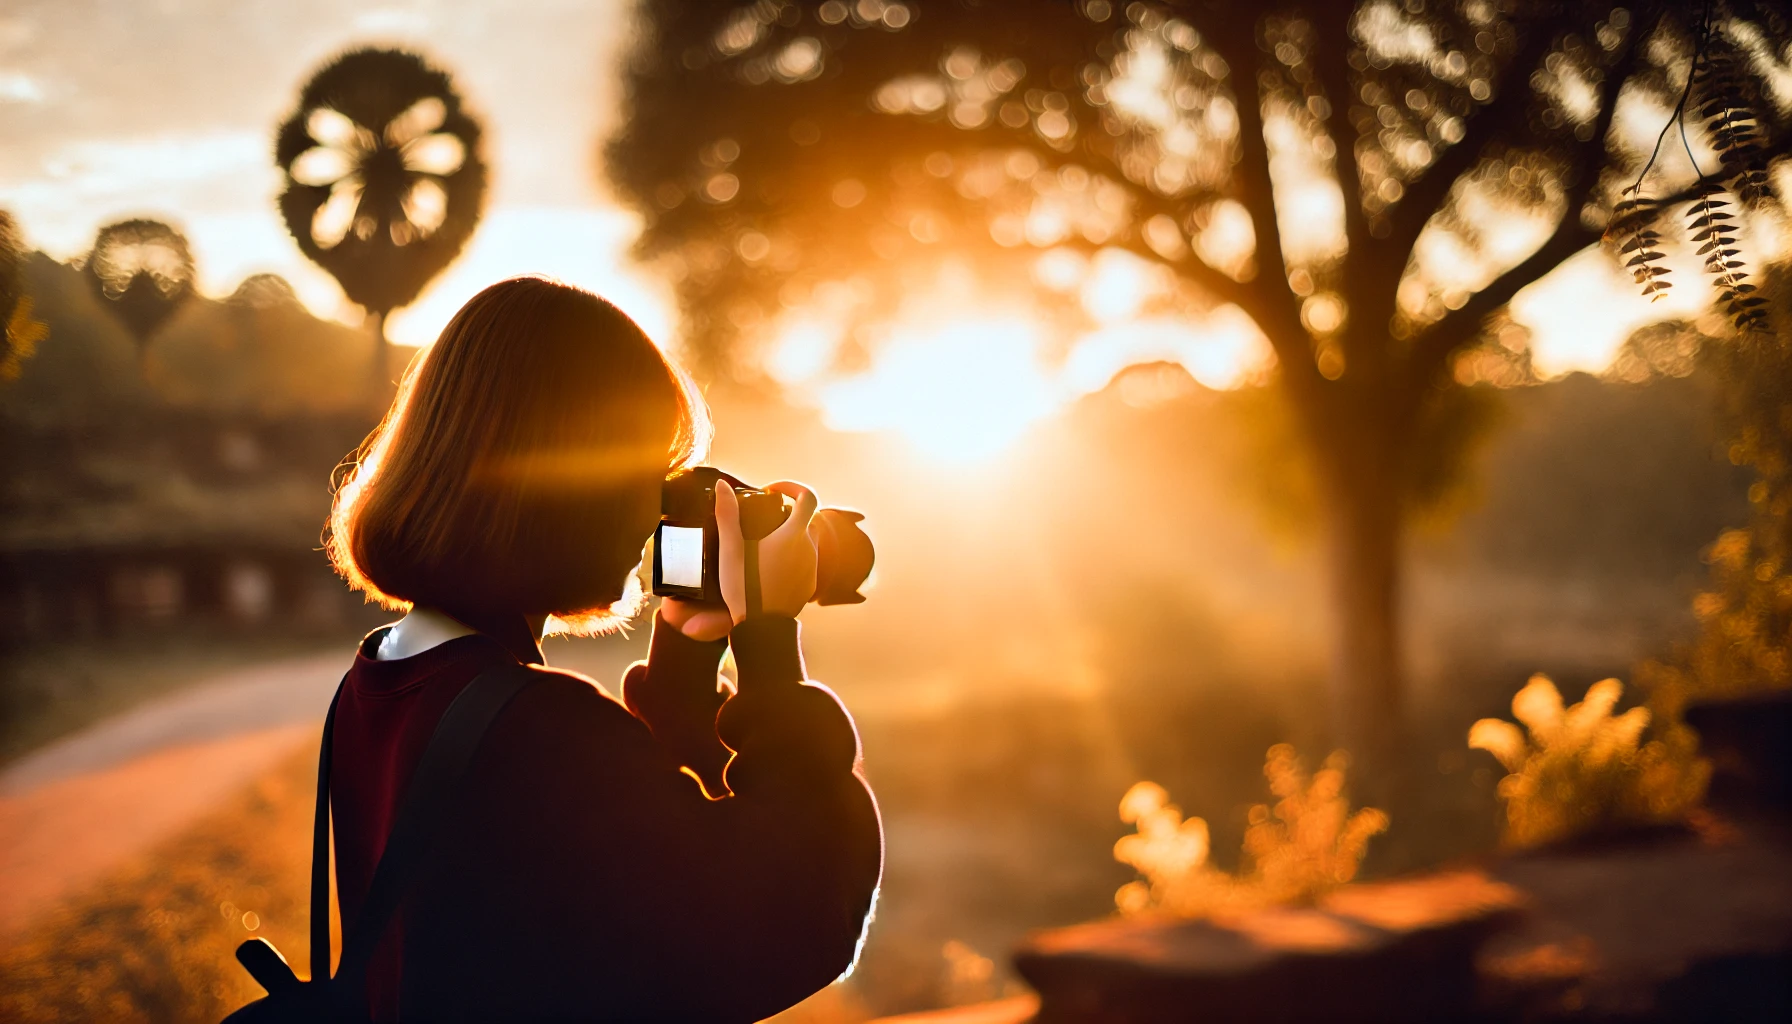
The Golden Hour occurs shortly after sunrise and just before sunset, when the sun is lower in the sky. During this time, the sunlight is diffused and takes on a warm, golden hue, creating a soft and flattering effect on subjects. This is an ideal moment for capturing breathtaking landscapes, dreamy portraits, and backlit silhouettes.
Why is Golden Hour so special?
- Produces warm, golden tones that enhance skin tones and scenery.
- Creates long, soft shadows that add depth and texture.
- Minimizes harsh contrasts, making it easier to capture well-balanced exposures.
Tips for Shooting During Golden Hour:
- Use the sun as a backlight to create a soft glow around your subject.
- Experiment with silhouettes by positioning your subject in front of the sun.
- Adjust your white balance to “Daylight” or “Cloudy” to preserve the warm tones.
- Shoot in RAW format to have more flexibility in post-processing.
Blue Hour: Cool, Moody Light for Atmospheric Shots
The Blue Hour takes place just before sunrise and right after sunset, when the sun has dipped below the horizon but the sky still retains some light. This period is characterized by deep blue and purple hues, creating a cool and moody atmosphere. Blue Hour is perfect for capturing cityscapes, architecture, and dramatic landscapes with a cinematic feel.
Why is Blue Hour so special?
- The sky displays rich blue and purple tones, adding a mystical quality to photos.
- The soft, even lighting reduces harsh contrasts, making it great for night photography.
- City lights begin to glow, creating a beautiful balance between natural and artificial light.
Tips for Shooting During Blue Hour:
- Use a tripod to avoid motion blur, as light is significantly lower.
- Lower your ISO to reduce noise while increasing shutter speed to let in more light.
- Take advantage of reflections in water or glass surfaces to enhance the atmosphere.
- Adjust your white balance to “Tungsten” or “Fluorescent” for a cooler effect.
How to Make the Most of These Lighting Conditions
To maximize the beauty of Golden Hour and Blue Hour, planning is key. Use weather apps or photography apps like PhotoPills or The Photographer’s Ephemeris to determine the exact timing for your location. Arrive early to set up your composition, and experiment with different angles and settings to capture the best light.
By mastering these two magical timeframes, you can dramatically improve your photography, creating images that are rich in color, depth, and emotion. Whether you’re shooting a stunning portrait bathed in golden light or a cityscape glowing in deep blue hues, understanding these natural lighting conditions will elevate your skills and artistic vision.
How to Use Natural Light in Different Conditions
Natural light varies throughout the day and in different weather conditions, creating unique opportunities and challenges for photography. Understanding how to adapt to each scenario can help you capture stunning photos with a natural glow.
Direct Sunlight: Benefits, Challenges, and Tips
Shooting in direct sunlight can provide vibrant colors and sharp details, but it also poses challenges such as harsh shadows and overexposed highlights.
✅ Benefits:
- Produces bright, high-contrast images.
- Enhances colors, making them pop.
- Works well for dynamic and energetic compositions.
⚠️ Challenges:
- Can create harsh shadows on faces and objects.
- Overexposure may wash out details in bright areas.
- Causes subjects to squint due to strong light.
💡 Tips for Better Photos in Direct Sunlight:
- Use shade: Position your subject under a tree, building, or any shaded area for softer, more even lighting.
- Use a reflector: A white or silver reflector can bounce light back onto the subject, reducing harsh shadows.
- Shoot during Golden Hour: Early morning and late afternoon sunlight is softer and more flattering.
- Adjust camera settings: Use a lower ISO and a faster shutter speed to avoid overexposure.
Overcast Days: Soft, Diffused Light for Even Exposure
Cloudy days provide one of the best natural lighting conditions for photography because the clouds act as a giant softbox, diffusing sunlight evenly.
✅ Benefits:
- Eliminates harsh shadows.
- Provides even exposure across the image.
- Enhances details and textures, making it great for portraits and product photography.
💡 Tips for Overcast Photography:
- Increase brightness slightly in post-processing to avoid a dull appearance.
- Use a white balance setting to prevent images from looking too cool or gray.
- Capture rich details by emphasizing textures, such as in landscapes or close-up shots.
Indoor Natural Light: Using Window Light Effectively
Indoor lighting can be just as beautiful as outdoor light when used correctly. Windows act as a natural softbox, providing diffused light that enhances portraits and still-life photography.
✅ Benefits:
- Soft and directional light that adds depth to images.
- Allows control over light intensity by adjusting curtains or blinds.
- Works well for intimate and artistic compositions.
💡 Tips for Using Window Light:
- Position your subject: Place them at an angle to the window to create natural highlights and shadows.
- Use curtains as diffusers: Sheer curtains help soften harsh daylight for a more flattering effect.
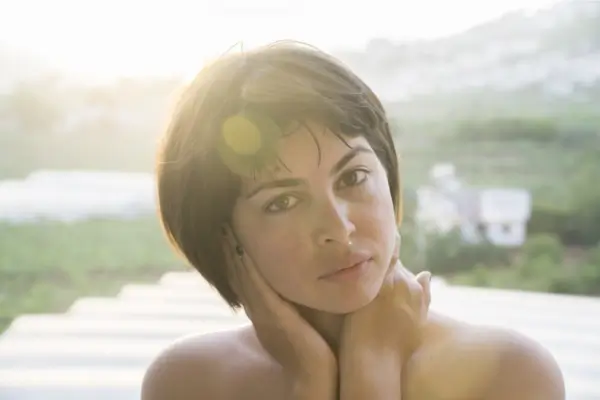
- Experiment with backlight: Position the subject in front of the window for a glowing, ethereal look.
Backlighting Techniques: Creating Silhouettes and Rim Light Effects
Backlighting occurs when the main light source is behind the subject, creating a dramatic effect that can enhance storytelling in photography.
✅ Benefits:
- Creates stunning silhouettes for artistic shots.
- Adds a glowing rim light around the subject for separation from the background.
- Works well during sunrise and sunset for a warm, dreamy effect.
💡 Tips for Mastering Backlighting:
- Adjust exposure: Underexpose slightly to preserve details in bright backgrounds.
- Use a reflector or fill flash: This helps brighten the subject without losing backlight effects.
- Experiment with angles: Move around the subject to find the best light balance and creative composition.
By understanding and adapting to these different natural lighting conditions, you can dramatically improve the quality and creativity of your photos. The key is to experiment and observe how light interacts with your subject to achieve the best results. 🌞📷
Essential Tips for Capturing Stunning Photos with Natural Light
Natural light is one of the most powerful tools in photography, but using it effectively requires a good understanding of how it interacts with your subject. Here are some essential tips to help you harness natural light for stunning photos.
Positioning Your Subject Relative to the Light Source
The way light falls on your subject dramatically affects the mood, contrast, and details of your image. Here are three common lighting positions and their effects:
- Front Lighting: When the light source is directly in front of your subject, it evenly illuminates the face and reduces harsh shadows. This is ideal for portraits but can sometimes make images appear flat.
- Side Lighting: Placing the light source to the side creates depth and dimension, enhancing textures and details. This technique works well for dramatic portraits or artistic compositions.
- Backlighting: When the light is behind your subject, it can create beautiful silhouettes or a soft glow around the edges, especially during golden hour. Use a reflector or adjust exposure to maintain details in your subject’s face.
Using Reflectors and Diffusers to Control Harsh Lighting
Bright sunlight can create harsh shadows and high contrast, which may not always be flattering. Using simple tools like reflectors and diffusers can help:
- Reflectors bounce light back onto your subject, filling in shadows and creating a more balanced exposure. A white sheet, a piece of foam board, or a professional reflector can do the trick.
- Diffusers soften harsh light by scattering it. A translucent umbrella, sheer curtain, or even a piece of white fabric held between the sun and your subject can create a more flattering, even light.
Adjusting White Balance for Natural-Looking Colors
Different times of day and lighting conditions can affect the color temperature of your photos. Adjusting the white balance ensures that colors appear natural:
- Daylight Mode works well for most outdoor shots in bright conditions.
- Cloudy or Shade Mode adds warmth to compensate for cool tones on overcast days.
- Custom White Balance allows you to manually adjust for unique lighting situations by using a gray card or a neutral-colored surface.
If you shoot in RAW format, you can easily correct white balance in post-processing without losing image quality.
Experimenting with Shadows for Creative Compositions
Shadows add depth, texture, and a sense of mystery to photos. Instead of avoiding them, use them creatively:
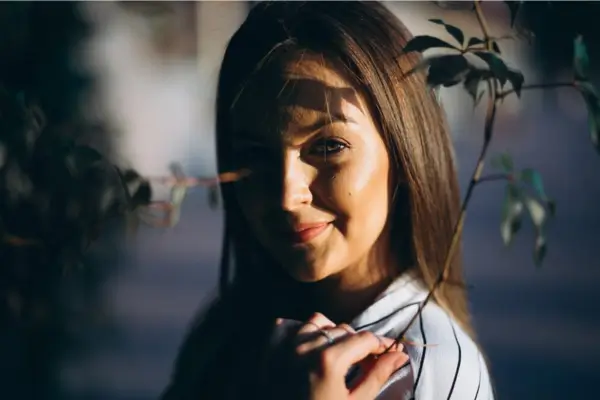
- Dappled Light: Shooting under tree branches or through lace curtains can create interesting shadow patterns on your subject.
- Strong Contrasts: Play with direct sunlight and deep shadows to create high-impact, dramatic images.
- Silhouettes: Capture your subject against a bright background (such as a sunset) for a striking, minimalist effect.
By understanding and manipulating natural light, you can elevate your photography and create visually compelling images. Experiment with these techniques and adjust them based on your unique shooting conditions!
Camera Settings for Natural Light Photography
Capturing stunning photos using natural light requires a good understanding of your camera settings. The right combination of ISO, aperture, and shutter speed will help you achieve a well-balanced exposure and make the most of different lighting conditions.
Choosing the Right ISO, Aperture, and Shutter Speed
- ISO: Keep your ISO as low as possible (ISO 100-400) in bright conditions to avoid noise. In low-light settings, gradually increase the ISO (e.g., ISO 800-1600) while balancing exposure and image quality.
- Aperture (f-stop): A wide aperture (e.g., f/1.8 – f/4) lets in more light, creating a blurred background (bokeh effect), ideal for portraits. A narrower aperture (e.g., f/8 – f/16) works better for landscapes, ensuring sharpness across the image.
- Shutter Speed: Faster shutter speeds (e.g., 1/500s or higher) freeze motion and work well in bright light. Slower speeds (e.g., 1/60s or lower) allow more light but require a steady hand or tripod to avoid blur.
Adjusting Exposure for Different Lighting Conditions
- Bright Sunlight: Use a low ISO (100-200), a fast shutter speed (1/1000s or higher), and a mid-range aperture (f/5.6 – f/11) to prevent overexposure.
- Overcast Days: Increase the ISO slightly (400-800) and use a wider aperture (f/2.8 – f/5.6) to compensate for lower light.
- Golden Hour: A wide aperture (f/1.8 – f/4) combined with a moderate shutter speed (1/250s – 1/500s) helps capture soft, warm light.
- Indoor Lighting: Position your subject near a window, use a wider aperture (f/2.8 – f/4), and increase ISO (800-1600) if needed.
Using Manual vs. Auto Mode for Better Control
- Manual Mode (M): Gives full control over exposure settings, ideal for advanced users who want precise adjustments.
- Aperture Priority Mode (A/Av): The camera adjusts the shutter speed while you control the aperture, great for portraits and landscapes.
- Shutter Priority Mode (S/Tv): Lets you set the shutter speed while the camera adjusts the aperture, useful for capturing motion.
- Auto Mode: Suitable for beginners, but it limits creative control and may not always select the best settings for natural light photography.
By mastering these settings, you can adapt to different lighting conditions and capture stunning, naturally lit photos with confidence.
Common Mistakes to Avoid When Using Natural Light
Even though natural light is one of the best tools for photographers, using it incorrectly can lead to disappointing results. Here are some of the most common mistakes to avoid when working with natural light and how to fix them.
Overexposing or Underexposing Images
One of the biggest challenges in natural light photography is achieving the right exposure. When there’s too much light, your image may be overexposed, losing details in the highlights. On the other hand, too little light can result in an underexposed photo with dark, shadowy areas where details are lost.
How to fix it:
- Use your camera’s exposure compensation (+/-) to adjust brightness.
- Check the histogram on your camera to ensure balanced exposure.
- Shoot in RAW format to recover lost details in post-processing.
- Use reflectors or diffusers to control excessive brightness or soften shadows.
Ignoring the Direction and Intensity of Light
Natural light changes throughout the day, and its direction plays a crucial role in how your subject appears. Shooting without considering where the light is coming from can result in harsh shadows, uneven lighting, or even unflattering portraits.
How to fix it:
- For soft and even lighting, position your subject facing a large light source, such as a window or an open sky.
- Use backlighting creatively to create silhouettes or a dreamy glow.
- Experiment with side lighting for dramatic and high-contrast effects.
- Pay attention to cloud cover—overcast days provide soft, diffused light that’s ideal for portraits.
Not Considering the Time of Day and Its Effect on Mood
The mood of your photos is highly influenced by the time of day. Shooting at midday, when the sun is at its highest, often creates harsh shadows and high contrast, which may not be ideal for every style of photography.
How to fix it:
- Take advantage of the Golden Hour (shortly after sunrise or before sunset) for warm, soft, and flattering light.
- Use the Blue Hour (just before sunrise or after sunset) for a cooler, more atmospheric effect.
- If you must shoot in midday light, look for shade or use a reflector to soften harsh shadows.
By avoiding these common mistakes and making small adjustments, you can harness natural light to create more stunning and visually appealing photos.
Conclusion
Mastering natural light in photography is a game-changer, whether you’re capturing portraits, landscapes, or still-life images. By understanding how light changes throughout the day, positioning your subject strategically, and adjusting your camera settings accordingly, you can significantly enhance the quality of your photos.
Remember these key takeaways:
- The Golden Hour and Blue Hour offer the most flattering natural light.
- Overcast days provide soft, diffused lighting that reduces harsh shadows.
- Window light can be a powerful indoor light source for natural-looking portraits.
- Adjusting exposure, using reflectors, and experimenting with shadows can add depth and creativity to your shots.
Now, it’s your turn! Get out there and experiment with different lighting conditions to see how they impact your photos. Share your best natural light shots in the comments or let us know your favorite lighting techniques! If you have any questions, feel free to ask—we’d love to hear from you. Happy shooting! 📸✨